RAW – Not just a noise a lion makes.

Welcome back to my blog, and to this series of articles which I hope will help you understand some of the technical stuff relating to digital photography.

In the previous article I explained in basic terms what a jpeg is, why it’s a good thing, and why every home should have one. I also mentioned RAW, which is the subject of this article.

“What,” I hear you cry, “is a raw file?” Well if you’re sitting comfortably, I’ll tell you.

In the simplest terms, a raw file is the digital image file a camera creates before it converts it into a jpeg. All cameras start by creating a raw picture file every time you take a photo, it’s just that only professional and higher-end amateur cameras allow the photographer access to any kind of raw file to play with. The rest simply use the camera’s onboard computer to quickly turn the picture files into jpegs, and of course you never see this process.

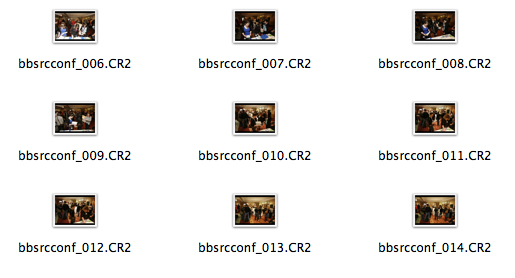
Different makes of camera produce different forms of raw file. Canon use formats with names like “.CR2”, while Nikon has the “.NEF” file format. These files need to be run through special software in order to be able to make adjustments and then save the files in more commonly readable formats such as jpeg.

a window displaying raw files

Note the .CR2 file extension.

Which seems a lot of trouble to go to when your camera can produce a jpeg automatically. However, there is a reason why raw files are useful, and why I always shoot using the RAW format setting of my camera.

Raw files contain far more picture information than jpegs. More colour, more pixels, more highlight and shadow detail and no compression (explained in the jpeg article). This means I start with a higher-quality file to work from, and a higher quality file delivered to my client.

Even among some photographers working as professionals there is some confusion about what constitutes a raw file, and it’s worth checking with the photographer you’re looking to work with if they’re shooting RAW or jpeg. If they start talking about “raw jpegs”, run. Run like the wind and don’t look back. There is no such thing as a raw jpeg. A jpeg straight off the back of a camera can be fine for non-professional work, or for editorial where turnaround speed is of the essence, but for anything else, it’s best to start with a RAW file.

I’ve tried to give a decent, overall explanation of RAW, but as with all these articles, if you’d like to know more, do please get in touch or comment here.

My next article will explain file sizes, picture resolution, and how to bake a perfect meringue.

Jpeg-schmapeg, what’s all this about?

For some years now, digital has been the default method for capturing photographic images. In fact I haven’t had a client ask me to shoot film in the last eight years, but despite this there still appears to be a lot of mystery surrounding digital.

This handy guide is part of a series I’m writing to help explain some of the processes of shooting and supplying digital images, and bust some of the jargon that might otherwise sound like the teeth-sucking obfuscation of a car mechanic.

I’ll start with an explanation of the JPEG format, which is something you should at least be familiar with even if you’re not sure what it means. You’ll probably know of jpeg as the standard image format you get when you use a compact digital camera.

So what is jpeg? Jpeg (normally seen as “.jpg” on the end of an image file name) is a data compression algorithm. Or in simple terms, it’s a way of squeezing lots of data into a smaller space on your storage device, be that a camera storage card, hard drive, CD etc. You should notice that the file size of the image on your hard drive is much smaller than the stated file size when you open the photo in Photoshop or similar other software. This is because the algorithm is designed to take data away (mostly neighbouring pixels) when the file is being closed, and put data back in when it is opened.

One way Jpeg works is by throwing away information which is repeated in the picture. A good example is a blue sky. The jpeg algorithm might say that since there is a lot of blue in one part of the picture, it can safely discard a percentage of blue pixels, but leave a little note to Photoshop saying “when you open this picture, stick some blue in here mate and it’ll look fine”. So when you re-open the file, Photoshop will see the note and know to fill in the spaces where colour information has been discarded. This system works well, but can lead to strange patterns, sometimes called artifacts, when too much compression is applied.

Detail of portrait photo showing low jpeg compression

This image detail shows normal compression.

Portrait detail showing over compression

This version shows over-compression.

The amount of jpeg compression can be set according to different needs and preferences. You can compress a file a lot so it loads quickly within a web browser, or compress it not very much to achieve higher quality for printing.

However, there are pitfalls (such as the artifacts I already mentioned) associated with over compression. Whenever you compress a jpeg, some of the image data is lost so that the next time you open the file it won’t be as high quality as it was before you compressed it. Imagine folding an oil painting to fit it through a letter box. It will never look as good as it did before you folded it.

So used carefully, jpeg is a great way of moving images around and displaying them on web pages, but needs to be handled with care – especially when you want to reproduce images in print.

Personally I shoot all my assignments in the RAW format, which I’ll explain in my next article. Future articles will look at post production, colour reproduction and whatever else pops into my pretty little head along the way.

As with all my blogs, if you have any questions or comments you would  like to make, please feel free to contact me or post a comment here.

If you would like a copy of this article for reference, I’ll be hosting it in the Free Resource section of my web site in due course.

Article and photos © Tim Gander 2009. All rights reserved.

Top 11 Tips for booking a photographer.

A couple of blogs ago I promised a quick guide to choosing a photographer for your project. Then I forgot and instead wrote something terribly witty about Leonardo da Vinci and infinite monkeys. I know it was witty because somebody said so. “That’s witty”, they said.

Getting back on track, here is the blog I originally promised. As a bonus I’m doing it in a top ten list sort of a form. As a double bonus, and in the style of Spinal Tap, my top ten list goes to number 11, so it’s one better than all the other top ten lists.

So here, in roughly the right order are your top 11 tips to finding, briefing and booking the right photographer for your project. This is only a rough guide of course, but it should help you with the basics.

1. You need to start by defining what the project is, and what style and quality you’re looking to achieve. From this you should be able to construct a rough brief, even if it needs adjusting later.

2. Start by looking for the photographers who can help you; specialists in the kind of photography you’re after. With each field of photography well catered for, there’s little point looking for a wedding photographer for a corporate shoot,  or an interiors photographer for press shots. It just happens I don’t shoot underwater pet weddings, so please don’t ask.

3. Talk to a few photographers and get an idea of the different rates and approaches they have.

4. It’s only fair to get firm quotes based on a clear brief, so whittle down your choice and start to talk about fees, either with a couple of photographers or with the one who shoots to the style and quality you need. I went into more detail about how rates work in the last-but-one blog. The photographer can often help develop the brief at this stage.

5. A brief consists of the date, time, location, what the pictures are to be of, how many pictures are required (approximately if necessary), your contact name, email and mobile number.

6. The brief also includes what the pictures are to be used for. This also helps define the likely fees, as well as informing the photographer on certain technical and artistic considerations.

7. You will need to know the photographer’s terms and conditions. These should be pretty standard, but check them all the same. Mine stipulate a bowl of M&M’s* on arrival.

8. Allow the photographer to liaise with your designer (if you’ve hired one). It can save a lot of time if the photographer knows how the images are to fit within the design.

9. Agree how the pictures are to be delivered, what file sizes are required (the photographer will advise you on this) and how soon after the shoot they are required.

10. Make sure you liaise on any special instructions that will help the photographer – props, access to the building, parking. It’s easy to forget that photographers need equipment, some of it heavy, so a nearby parking space makes us feel valued. We have such simple pleasures. Oh and don’t forget the M&M’s.

11. Finally, you should enjoy the day. It’s a break from the office routine, and I promise I’ll share the M&M’s. Mmm M&M’s…**

*Apostrophe police, please note the apostrophe in M&M’s is there because the manufacturer put it there, though it begs the question “M&M’s what?”

**I am not paid by Mars confectionary (manufacturer of M&M’s) to promote M&M’s, however if Mars would like to make a donation of M&M’s to me, they should contact me first for my address.

Article and photos © Tim Gander. All rights reserved 2009