Case Study

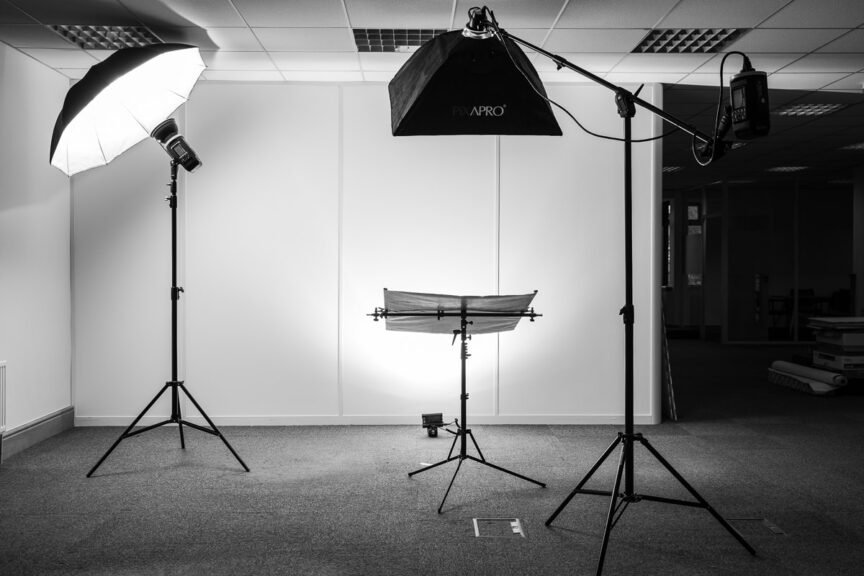
When an old photo of my lighting kit popped up in my Facebook memories, the first thing I spotted was the bottle of wine. Of course it was. Not only did it remind me of the generosity of a particular client at the time, but it also sparked an idea to write an article about how kit has changed over time. So I took a photo of my kit today to compare and contrast.

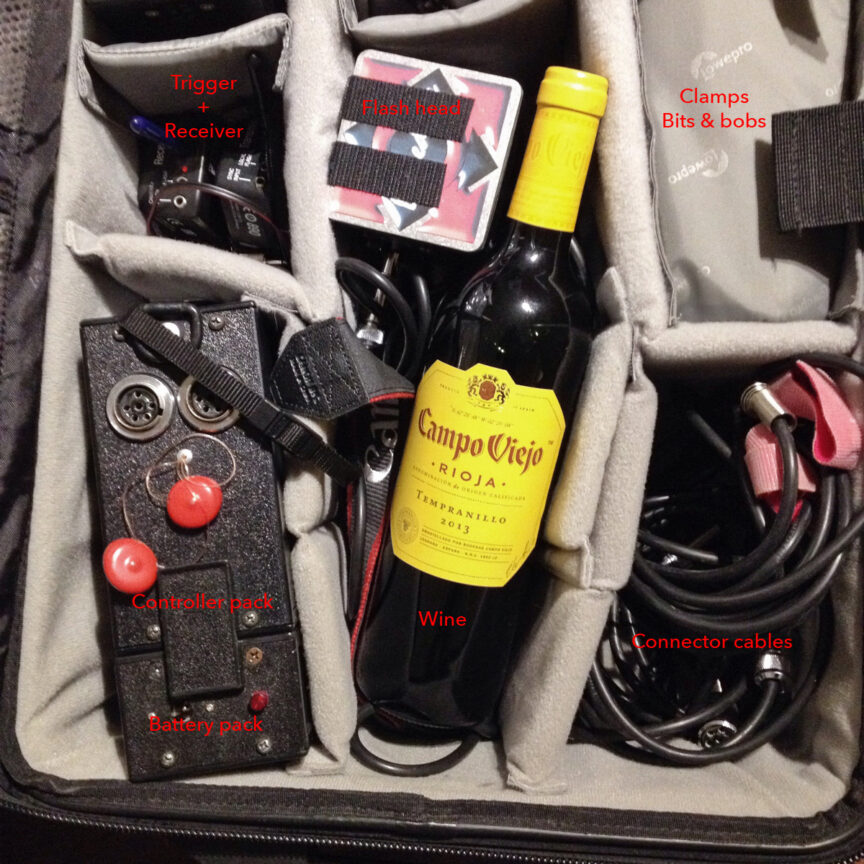
Picture 1 was taken in 2015 and shows (apart from the wine) my portable studio flash lighting equipment of that era (in fact, this kit was already several years old by then).

Sadly the photo was already cropped square, so I can’t tell you what was in the rest of the bag; I’m guessing you’d see the second flash head, a spare battery and some other bits and pieces. I clearly took the photo for the purpose of showing off the bottle of wine I’d been given.

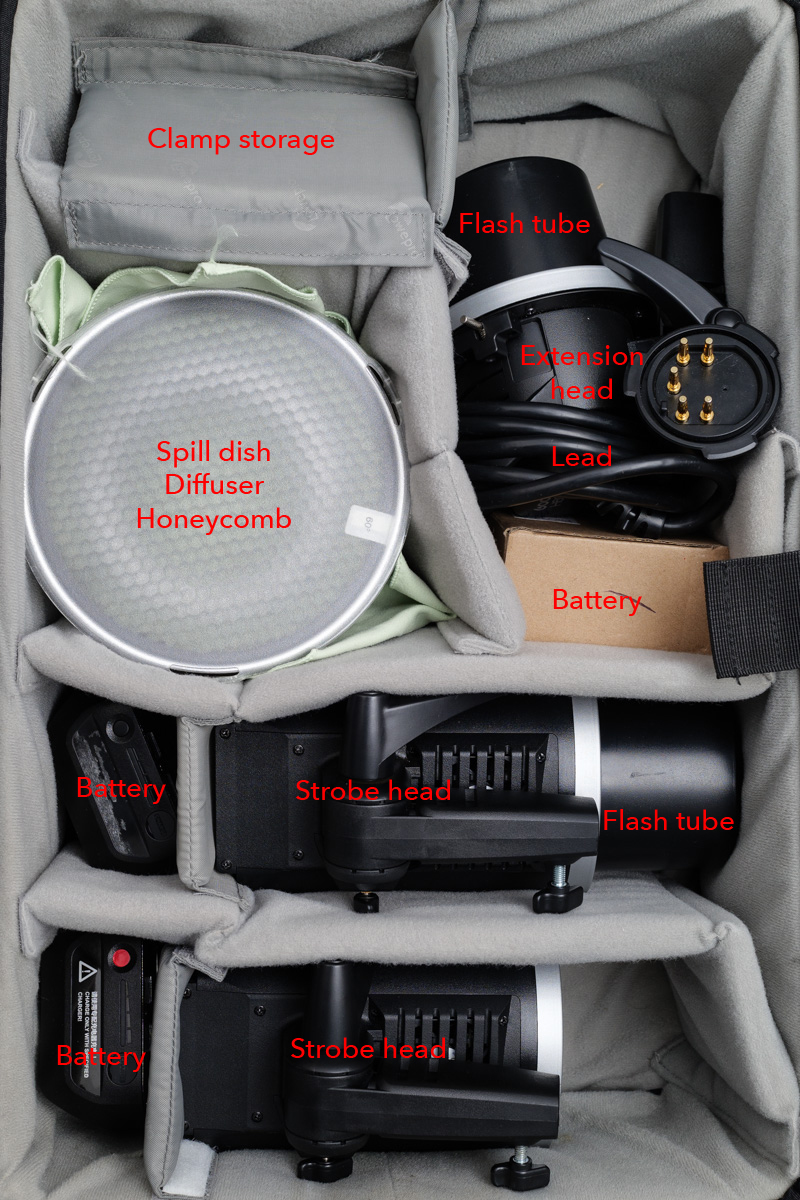
So, apart from the wine (shut up about the wine now, Tim), what else is different? Let’s go through some of the components in the bag, and then compare them with today’s kit in Picture 2. I’ve made these pictures BIG so you can see the labels.

At the top-left in Picture 1, you’ll see a trigger and receiver. Nothing remarkable there, except today’s receivers are built into the flash heads themselves. This saves having to Velcro a trigger to the back of the head and rely on a cable to send the firing signal to the flash. It’s a little bit tidier now.

The other disadvantage of the old system was that you could only adjust the power of the flash head by walking up to the controller pack and turning a dial. Modern units can be controlled from the camera, which saves a lot of time and back-and-forth.

This old kit was pretty revolutionary in its day. It was the first properly powerful, affordable kit that ran off batteries. It could be used outdoors and the light could be adjusted through softboxes, umbrellas or any number of other modifiers to achieve a particular look.

But technology moves on, and its main disadvantages over my current kit are power and control. The kit in Picture 2 is at least 50% more powerful than the kit it replaced. This might not seem that much, but it makes a big difference in photographic terms. The more modern design also has the advantage that each flash head is independently controllable from the other, and the increments of control are far finer than with the old kit.

The other disadvantage of the older kit was the build quality. The manufacturer, Lumedyne, is US-based and their kit looks and feels as though it’s been built by keen mechanics in a shed. Sometimes not all that well either. I remember screws dropping out, a control knob falling off and on one occasion, a loud POP! and a puff of blue smoke as an internal component blew up.

I probably had that kit for a decade though, and while it was expensive at the time, it more than paid for itself.

Thankfully, I’ve had the newer kit (made by Godox) for almost as long already, and it’s not showing any signs of ageing. I’ve added an extra spare battery as one of the originals isn’t taking a charge as well as it used to, but that’s about it.

Apart from technological advances, the other reason I switched to Godox was because Lumedyne is no longer distributed in the UK, so replacing parts or expanding the kit would be difficult.

Possibly more impressive than any of the technical advances of the contents is the case itself. Both flash kits have been safely transported inside the same LowePro Pro Roller 2 case, which must now be circa 20 years old. About a year ago, I finally replaced the wheels but apart from that this case just keeps… rolling.

The wine, sadly, is a distant memory, but good quality wine is readily available in several outlets. So next time I work with you, have a peek inside my rolling camera case while my back is turned. If there’s a wine bottle-shaped space in there, feel free to pop something nice in, like a Tempranillo or a Malbec. Some technology never really needs updating, just replenishing.

 

Portrait of an Artist

Any serious photographer will relish photographing a great artist, so I certainly enjoyed this photoshoot.

At just 26 years old, Eli Gander has rapidly built a reputation as one of the finest tattoo artists around. Now if the name sounds familiar, I’m Eli’s dad so you might think I’m biased.

But bear in mind that Eli has a permanent waiting list. She has over 15,500 Instagram followers and she’s just opened her own tattoo studio. She has invitations to work as a guest artist at other studios, which shows how much respect she’s already gained. Did I mention she’s just 26 years old? Think about that for a moment. So yes I’m biased, but her progress has been astonishing.

Eli’s Story

Eli decided she wanted to be a tattoo artist when she was a teenager. She started her training when she was too young to have a tattoo herself, and she pretty much put herself through hell to get there, often holding down waitressing jobs to pay her way.

Now all that grit and determination is paying off, and I can’t tell you how excited I was to visit her newly-opened studio in the heart of Trowbridge to shoot a few portraits for her website and social media channels.

The pictures

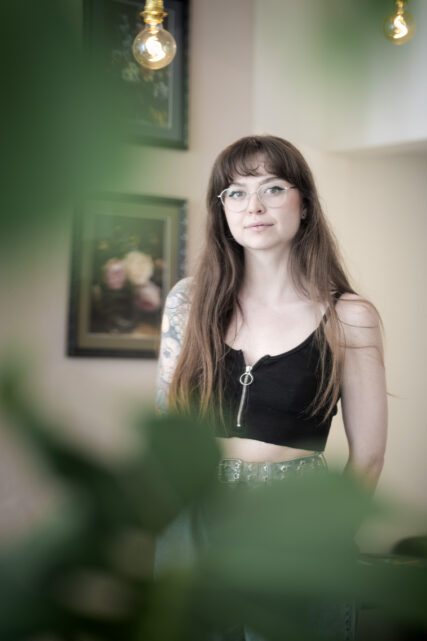
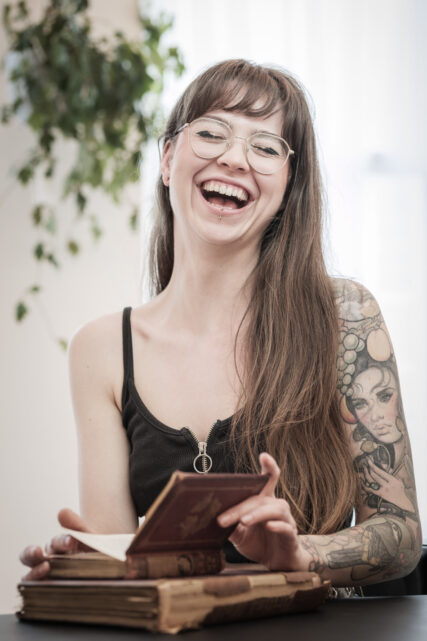
These are just couple of the images I took. On the left is one shot into a mirror to condense as much of the mood of the studio into a single image as I could. And on the right is one she hasn’t used, but is a wonderful, un-guarded moment.

Eli’s style is intricate botanical designs and since her studio is festooned with plants, it was inevitable I would bring these elements into the images.

To see more of Eli’s work, visit her Instagram account or the Alchemilla website https://alchemillatattoo.com/

I’m looking forward to seeing Eli’s practice grow. At this rate she’ll be taking the world by storm pretty soon.

Tethered Capture (seeing the bigger picture)

There’s been a bit of a kerfuffle in the press lately about Royalty and tethering (I won’t expand on that here) and it reminded me that I’ve never really explained what tethering means from a photographer’s point of view and why it might be useful to a client.

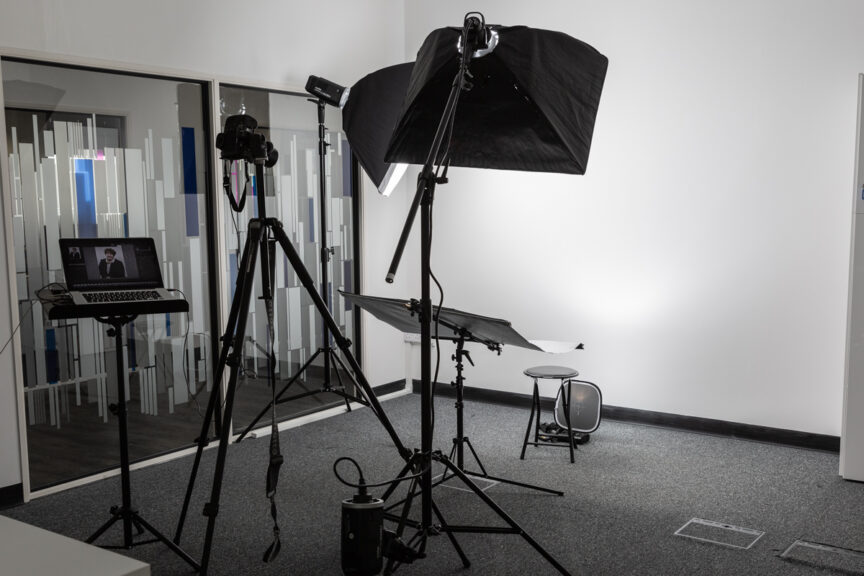
Tethering is a method of taking photos while the camera is linked to a laptop via a cable, but what it involves and why you’d want to do it is worth a little further explanation.

Tethered capture, as it’s often called, allows the photographer to review photos on a laptop within about a second of them being taken. Of course pictures can be reviewed on the back of the camera, and that’s my regular way of working. However that tiny little screen, often obscured with nose grease (yum!) isn’t always the best way to check fine detail.

A far better solution is to take test shots, then review them on the laptop screen to see how the light is working and whether any tweaks to clothing or hair might be necessary. Really fine details (a cat hair on a lapel, or a stray hair across an eye) are often only visible when viewed on a larger screen.

The software which allows the pictures to display on the laptop (I use Adobe Lightroom) can also be set to show a rough idea of the final treatment (colour, contrast, sharpening etc) that I’ll be using, so a marketing executive can get an idea of how the finished images will look and we can adjust according to their requirements.

Likewise the sitters also benefit from being able to view the images on a decent-sized screen so they can be happy with their shots before going back to their work. They’ll have a much clearer idea of what we’re getting and this can also help them relax into the shoot. Once we’re happy with the test shots, I don’t tend to look at the screen again until after each person’s sitting.

The other reason I like to work this way if I can is that it means the images are backed up automatically as I shoot – one set on the camera card, a duplicate set on the laptop hard drive. So if there is a failure, I’ve a better chance of recovering images which might otherwise be lost.

Of course tethering only works for the headshot work I do because camera movement is limited by the cable length and the reliability of the connection. I couldn’t shoot a corporate event or a conference using tethering, it just wouldn’t be practical, but for the business headshot it’s a useful tool.

It’s also possible to get camera and computer to communicate via wifi, but this can be too fiddly and unreliable, so I tend to use the cable method.

So if I turn up at your corporate headshot session with a music stand, don’t panic: I’m not about to pull a cello from my rolling case and launch into a Rachmaninoff sonata, sometimes it’s just handy to work tethered and to see the bigger picture.


Sweet Luxury

The other day I was asked to come into a business in Bristol to undertake a portrait session so members of staff could post to Twitter and LinkedIn with fresh, up-to-date (and importantly, professionally-taken) profile photos.

The pictures were taken at the end of an in-house social media training seminar, and I suspect this helped convince attendees of the importance of a decent avatar portrait. I believe this kind of training is an excellent idea for businesses wanting their staff to help promote the brand on online platforms, and of course a clean, clear profile photo gives their posts greater gravitas.

What made it for me though, apart from the lovely welcoming people I got to work with, was the huge amount of space I was given to work in.

If your business has just taken over larger premises and you haven’t quite expanded into it just yet, take the opportunity to make headway on your headshots. While the entire office isn’t crammed with furniture and people, it makes a great space to work in and I can light the portraits better than if I’m shoehorned into a stationery cupboard, or a board room with an immovable table filling it.

Of course once you’ve filled the space, I’ll need to come back to photograph all the newly appointed team members. Don’t worry though, as long as there is room enough, I can make the lighting work. It’s just so much nicer when there’s space a-plenty.


Learning to Assist, Assisting to Learn

The work of a business or corporate communications photographer (which is what I do) is rather different from that of a truly commercial one, by which I mean a photographer who shoots commercial images for advertising campaigns.

Most of what I do is pictures for business communications (website, brochures, press releases and so on), which while it’s commercial in the sense that I make money from my work, it’s not commercial in the strict photography business sense of being for commercials/adverts.

That may seem like a rather fine, specific point to open an article with, but it’s pertinent here because a few weeks ago I found myself assisting a commercial (as in advertising) photographer.

Now the other stand-out point of this article is that I was assisting another photographer at all. In 30 years of being a professional photographer I have never assisted, but when I was asked if I’d be interested in helping with a series of shoots I didn’t have to think too hard about whether or not to dive in.

The thing is, assisting is one of the best ways to learn and evolve as a photographer. I never did it because I trained as a press photographer and cut my teeth with news photography at college and local papers. This was a typical career path for many newspaper photographers.

For commercial and studio photographers, assisting was the way to learn the ropes, develop techniques and evolve your own style.

If I have one gripe about those starting out as photographers now (ok, I may have more than one gripe, but let’s keep this brief), it’s that too many of them think that to be a commercial photographer, all you need to do is read the camera manual and start taking pictures. If a friend or your mum tells you your pictures are nice, you launch a website and hey presto you’re a fully-fledged commercial pro. Believe me, without a few years of assisting, training and a baptism or two by fire, this just isn’t going to cut it.

Anyway, back to the plot. In my case, the call came from friend, fellow photographer and all-round-good-egg Jon Raine whose work you really should take a look at.

Jon’s background is very much in the commercial sphere, shooting pictures for big brands, and one of his regular gigs has been to take portraits of TalkSport presenters which is what he was asking me to assist him with on this occasion.

The obvious benefit of this gig for me was to work alongside someone who has deep experience as both a photographer and a commercial art director. Seeing how Jon plans and executes his work was a great insight, as was seeing the similarities between his methods and mine. It helped reinforce some of my practices for me, which is also useful.

The benefit for Jon was not only that he got to listen to my jokes all day, but there were also one or two small tips I was able to offer back.

Also, being a photographer myself meant I knew what to look out for as his images came through to the laptop – an errant hair, a badly placed crease in a shirt or white fluff on a dark top (not always easy to spot until flash hits it).

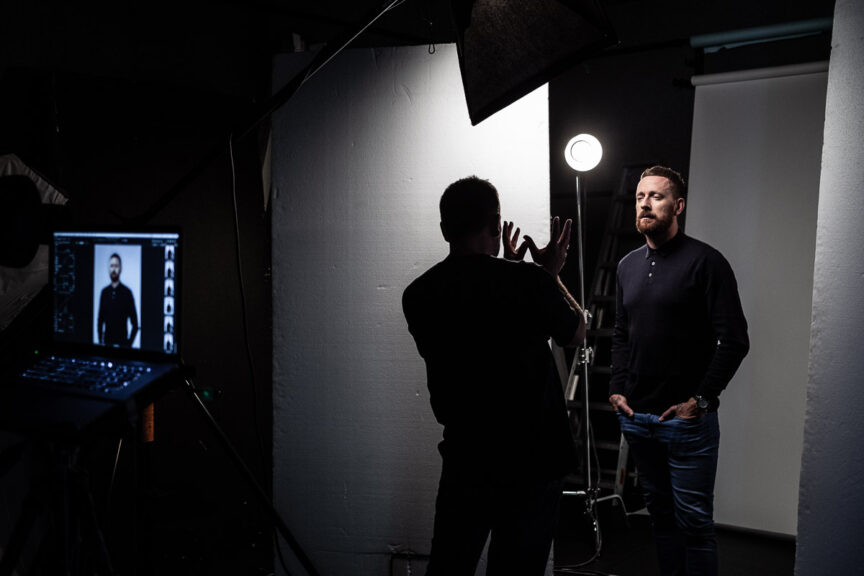
Another advantage for Jon was that I could take behind the scenes photos while he worked, which he could then use for a record of his work and social media if he wished. Of course that was a mutual advantage because now I’m using one of the photos for this blog post, a BTS shot of Olympic champion and Tour de France winner Sir Bradley Wiggins.

So everyone’s a winner! Including the subject.

Tunes On, Pop-Up and Drop In

I tried something a bit different yesterday, some might even call it radical, but let’s not get carried away.

Some background first; My office is based in a shared work hub in Frome in lovely Somerset. Here I can do my editing and admin and because the building hosts several other businesses, I have contact with a range of people working in everything from the charity sector to web developers, app developers, event stylists and many more. There’s even an oil rig support business here, which I suppose is handy for the North Sea.

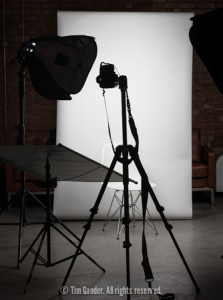
A portrait photography setup with lights, backdrop and camera on a tripod.

My go-anywhere portrait studio is perfect
for business headshots.

Over the past year or so many new businesses have taken up office space at the work hub as it’s expanded, and I realised there might be an opportunity to help them with a simple, social media portrait session.

Normally if I go to a single business to spend time taking corporate portraits I’ll charge a minimum of £250+vat, and more often than not it turns into a half-day at between £450 and £600, but this would be prohibitive for many of the micro businesses based in the hub. So how about setting up a pop-up studio in the communal space and offering a quick portrait session to anyone who wanted to come along and just charge for the images they download?

Obviously I had to keep the deal simple and decided to offer a no-sitting-fee session with downloads starting at just £30 including VAT for a small file suitable for LinkedIn, Twitter and the like, with a rising scale of fees according to the size of file downloaded.

The day went pretty well, especially since it was a first time for this event. I came in for 08:30 am to set up my studio, organised some tunes to add a relaxing ambience to the space and made test shots before the first arrival.

Black and white business portrait of David Evans of Ghost Ltd

The portraits are designed to be simple and clear so they’ll work right down to avatar sizes.

I had a steady trickle of people (I wouldn’t say I was killed in the rush) and I got the impression that even some of those less keen to be photographed actually quite enjoyed the experience.

I delivered the images in personal galleries to each of the sitters just two hours ago and the portraits have already started to sell!

What was even more encouraging was the number of people who expressed an interest in getting more

photography organised in future for things like website refreshes, so there was a promotional side-effect to my cunning plan too.

It’s possible I’ll turn this into an annual or even six-monthly event because I’m sure as word gets around, more people will want to sign up. In the coming days I’m going to make contact with other hubs in the area to see if they would like to host something similar. This little idea could grow.


When ‘specialist’ isn’t special.

“I specialize in natural light photography” is a statement you’ll see on some photographers’ websites, but what does it mean? What is ‘natural light’ and does it make these photographers special?

Let’s get any pretense out of the way first; I’m rarely convinced by such statements. To me the subtext of what they’re saying is, “I don’t know how to use flash, flash scares me so I’ll pretend I don’t need it. I’ll just say I’m a specialist at not using it.”

In essence natural light is any light which isn’t man-made. Sun and moonlight is about it, but looking at some of the ‘natural light’ photographers, they’ll happily pull electric light into their lighting armoury, regardless of the strange colour casts you’ll get on people’s faces under this lighting.

Sometimes the photographer will fix this by turning their pictures to black and white. Which is fine if the client wants black and white. Not so clever if the images are for a colour project.

There are very few photographers around who can genuinely limit themselves to only taking pictures using natural light and nothing else. William Eggleston springs to mind, but I’m not sure you can hire him for your wedding or commercial shoot.

Brian Harris is a working English photojournalist who very rarely uses flash, but can get away with it because of his talent combined with the kinds of commissions he takes on.

Location studio lit portrait of student

Photo taken in a lecture theatre, where light was so low the only option was a portable studio light

As for myself, I often have to work in difficult lighting conditions but make the pictures have a particular style and look. This might mean daylight is sufficient, but often means I have to supplement the daylight (or even replace it entirely) with portable, battery-powered studio flash.

This may not be as simple as pointing and shooting using whatever light there is, but for me the results are worth the extra effort.

If you’re looking at hiring a corporate photographer who “only uses natural light” or “never uses flash”, chances are they just don’t know how to use flash. This isn’t a skill or specialism, it just means they haven’t learned the basic requirements to do the job. It’s always best to check their website first, look out for a dominance of black and white, or strange and inconsistent skin tones. For your projects it’s often important to get a consistent style across all your imagery, and that’s where portable studio flash can help. Oh, and someone who knows how to use it!