Co-working Spaces For Corporate Photography

Tips for hiring a co-working hub when you have no office, or your office isn’t suitable.

While co-working spaces have been a growing trend for more than a decade, the Covid 19 pandemic definitely accelerated the move away from fixed, permanent offices for many businesses.

More generally, the co-working or shared office trend also reflects the post-pandemic rise in entrepreneurial ventures as people move away from wanting to work within large organisations, and more towards fulfilling their own dreams and ambitions.

Even large organisations have migrated teams out of big central hubs in favour of smaller, regional centres. It’s a trend which is currently growing, with little sign of abating.

Whatever the size of your business, there could be many reasons you don’t want a shoot in whatever space you have – perhaps it’s too small, or maybe it’s an uninspiring red brick cube with cramped desk-filled cubbies and a boardroom that serves its function, but isn’t aesthetically pleasing.

The Hiring Option

So if hiring a suitable space in a co-working environment is an option for your next corporate photography session, what are the advantages and disadvantages? And how can you get the most out of it?

This article will guide you through some of the challenges of finding the right spot for your office-less office shots and corporate portraits.

The Advantages

There are genuine advantages to having a photo session in a co-working hub:

• The look to suit you – from ultra-modern to supercool, you can find a space which reflects your attitude, personality and business values. Even better, all that interior design work has been done for you; it’s a photo set ready and waiting for you.

• Flexibility – depending on the requirements of the photo session, you can negotiate anything from a couple of hours to an entire day. Likewise you can scale the size of space you need depending on whether it’s a few simple headshots, images to reflect a meeting, a huddle or colleague collaboration across desks.

• All the kitchen and toilet facilities are there, and in the best hubs the staff will be only too willing and helpful when it comes to accommodating you and your team.

• Accessibility – if people are coming from various locations, co-working hubs are normally easily accessible by public transport or have parking nearby. Most co-working buildings, though sadly not all, are easily accessible by wheelchair too. That’s certainly worth checking in advance.

• A chance to get away from the desk – taking the time away from your usual surroundings to concentrate on your business image is no bad thing. It’s often a good time to have those “blue sky” thoughts while your brain is distracted by having to pose for the camera.

What To Look Out For

Of course you need to be aware of some of the pitfalls of this way of working.

• You’re away from the office! Although, I’d still argue the benefits outweigh the disadvantages of this.

• Finding the right space – with so much choice, it can be hard to find the space that fits your ethos precisely. I’m happy to help with this by offering ideas for locations I’ve used, or ones I’ve spotted and thought would be good. Here’s a search based on Bristol, my main city for work. Likewise for Bath, Chippenham and Swindon.

• Cost – It is an additional cost on top of the actual photography, but by leaving you (the client) to liaise directly with your chosen space, I don’t end up charging VAT on top of VAT, so it might not cost as much as you think.

• Finding enough space – Getting the right look can require a surprising amount of empty floor space, but I can usually advise on the best room to hire based on its size and flexibility.

• Fixtures and fittings – It’s surprising how many great looking spaces become difficult to work in because whichever way you turn, there’s a black monitor screen on a wall, an exposed conduit, light switches, thermostats, fire extinguishers, radiators, shelving, white boards… I could go on. The (often essential, sometimes arbitrary) wall clutter and objet d’art can ruin an otherwise promising space because it all gets into the background of a photo. It’s worth asking the host to send additional current photos of the space to include what’s on the walls from floor to ceiling height. Some things might be easily moved, others will be fixed, but hopefully some will be useful features in the photos.

• Lighting – I bring my mobile studio lighting kit to shape the light how I want it, but it’s still helpful to know in advance what windows or skylights are there and also what the light fittings look like. A chandelier might be groovy in real life, but it can look very odd in a business meeting shot. Again, a handful of current photos from the host can be useful here.

• It’s a shared space – While it might be easy to shut off a meeting room for a photo session, often the shared open spaces are full of photographic possibilities. This requires some diplomacy then if people are already set up and working in these areas, but I usually find a quick conversation about what we’re doing and how long we need is enough to minimise potential irritation.

• Things might change – From one photo session to the next, a co-working space might be refurbished, or they might close down. Ok, it’s a risk, but then few offices stay the same forever and there’s often a time at which it’s good to get everyone’s headshots re-done from scratch. That’s when a fresh space might be worth considering anyway.

Planning Planning Planning

The key to a successful photo session in a shared co-working facility is in planning the timing, location and access. Everything else is just the same as in working in your own space, such as choice of clothing and how you wish to present yourself to the camera.

With a little forward planning, your out-of-office photo session will not only be more successful, it’ll also be a more enjoyable experience.

If you would like more help on this, or any other aspect of planning your next corporate photo or video session, do drop me a line.

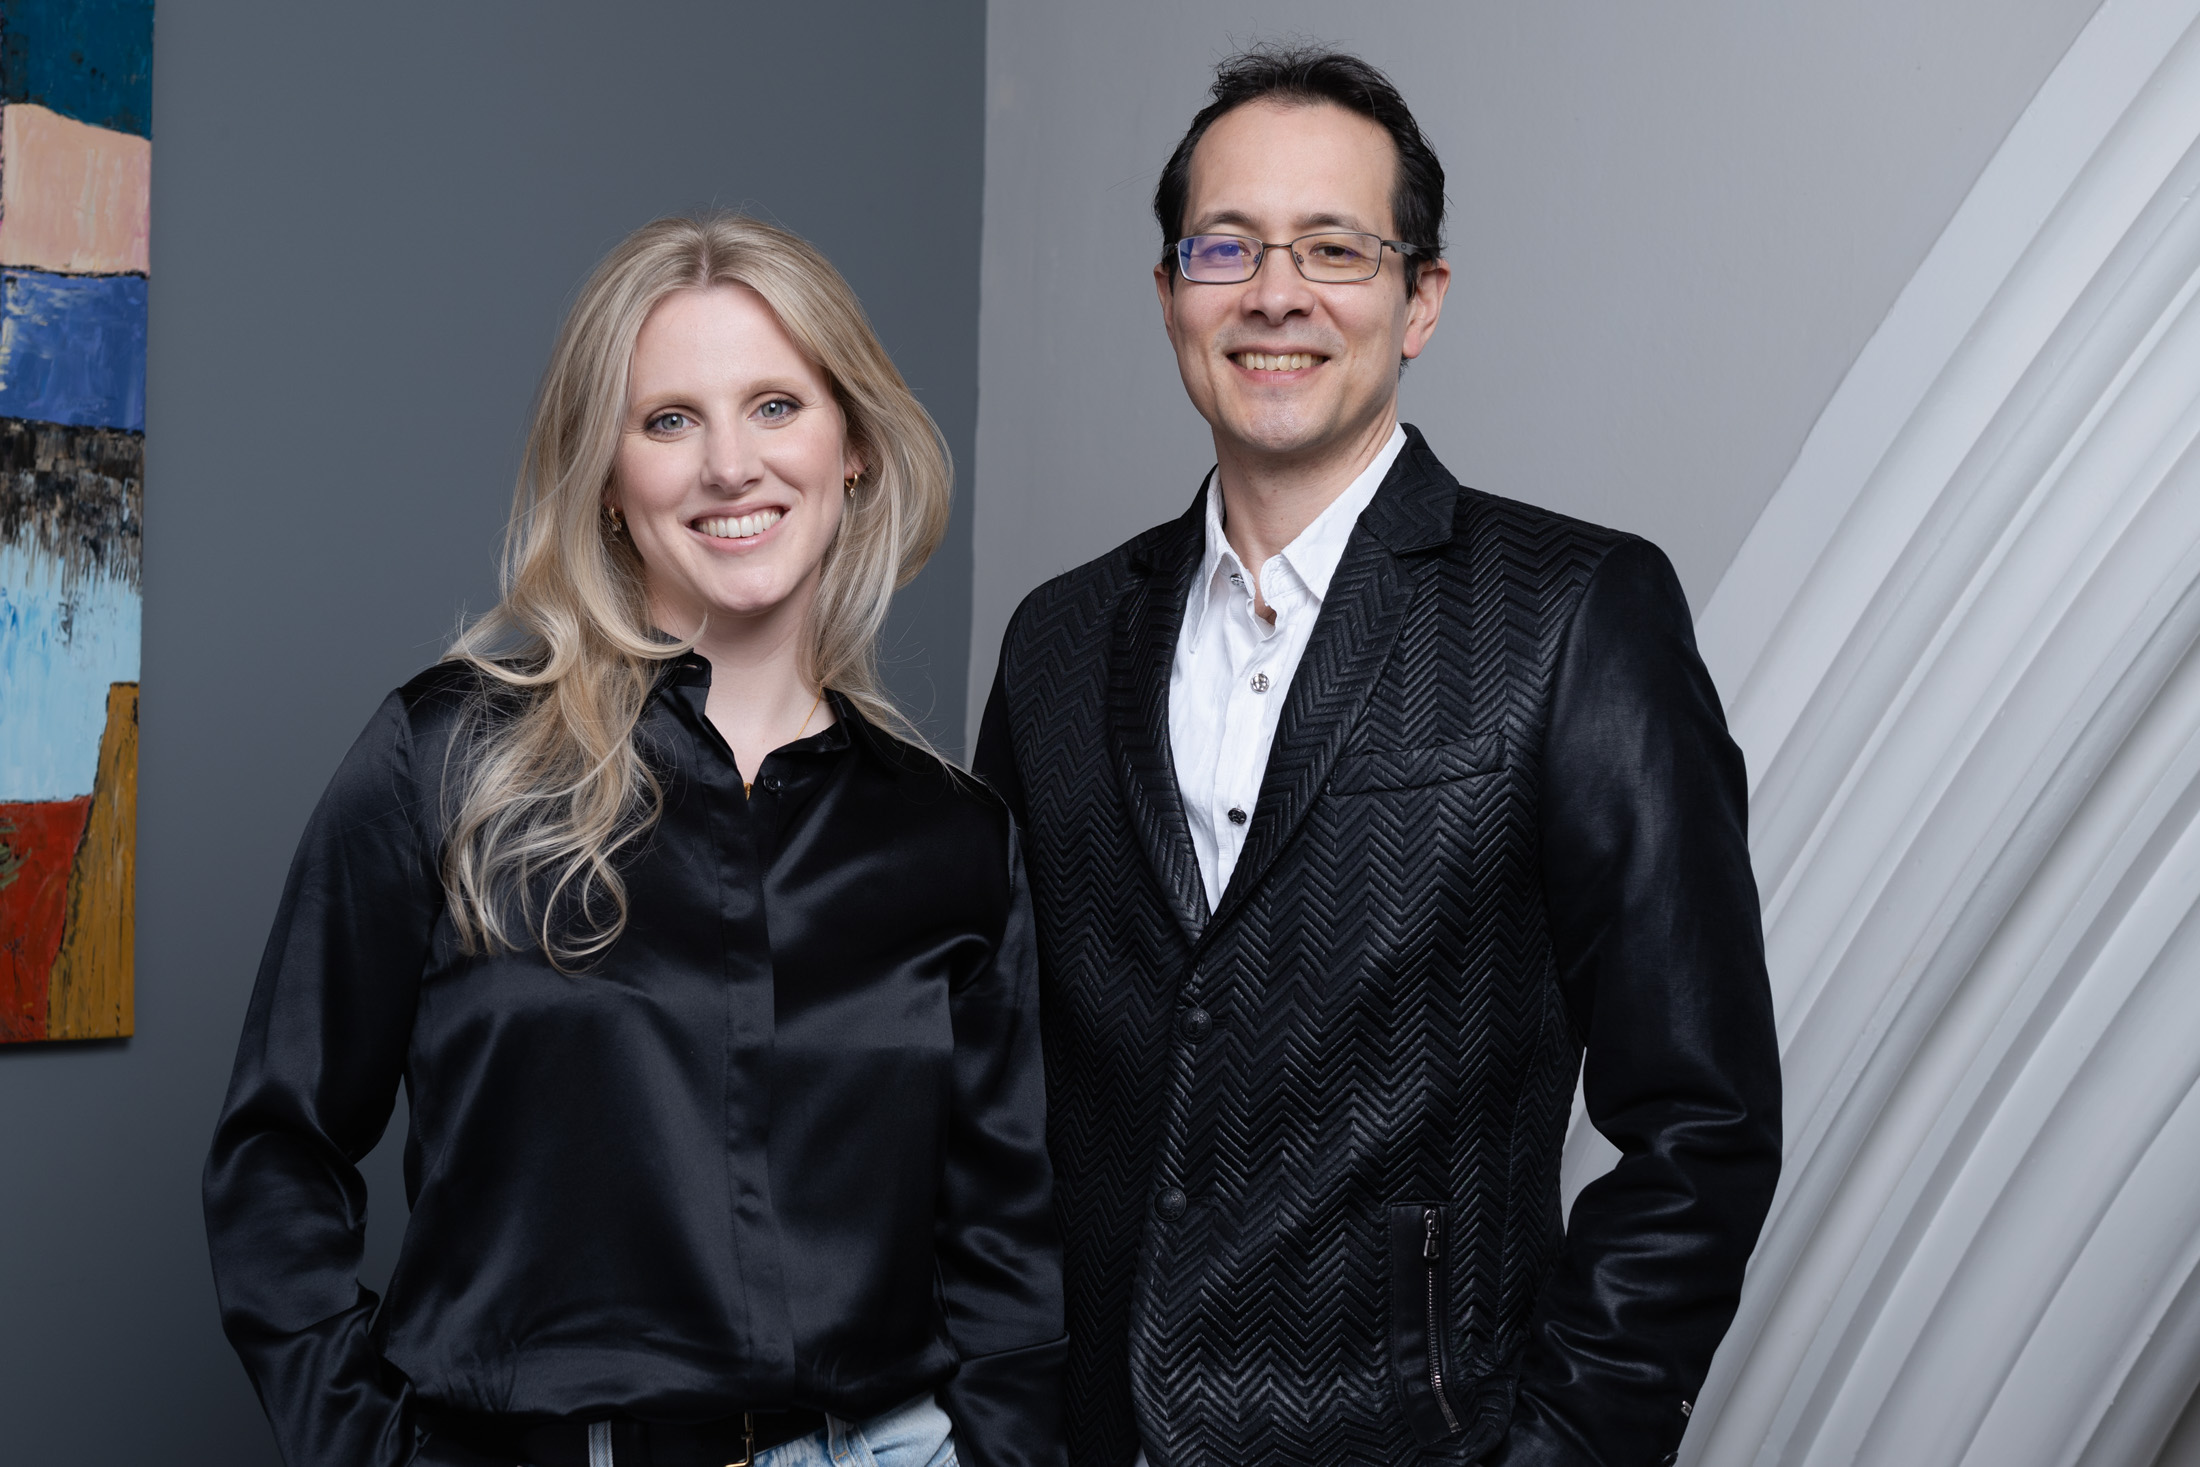
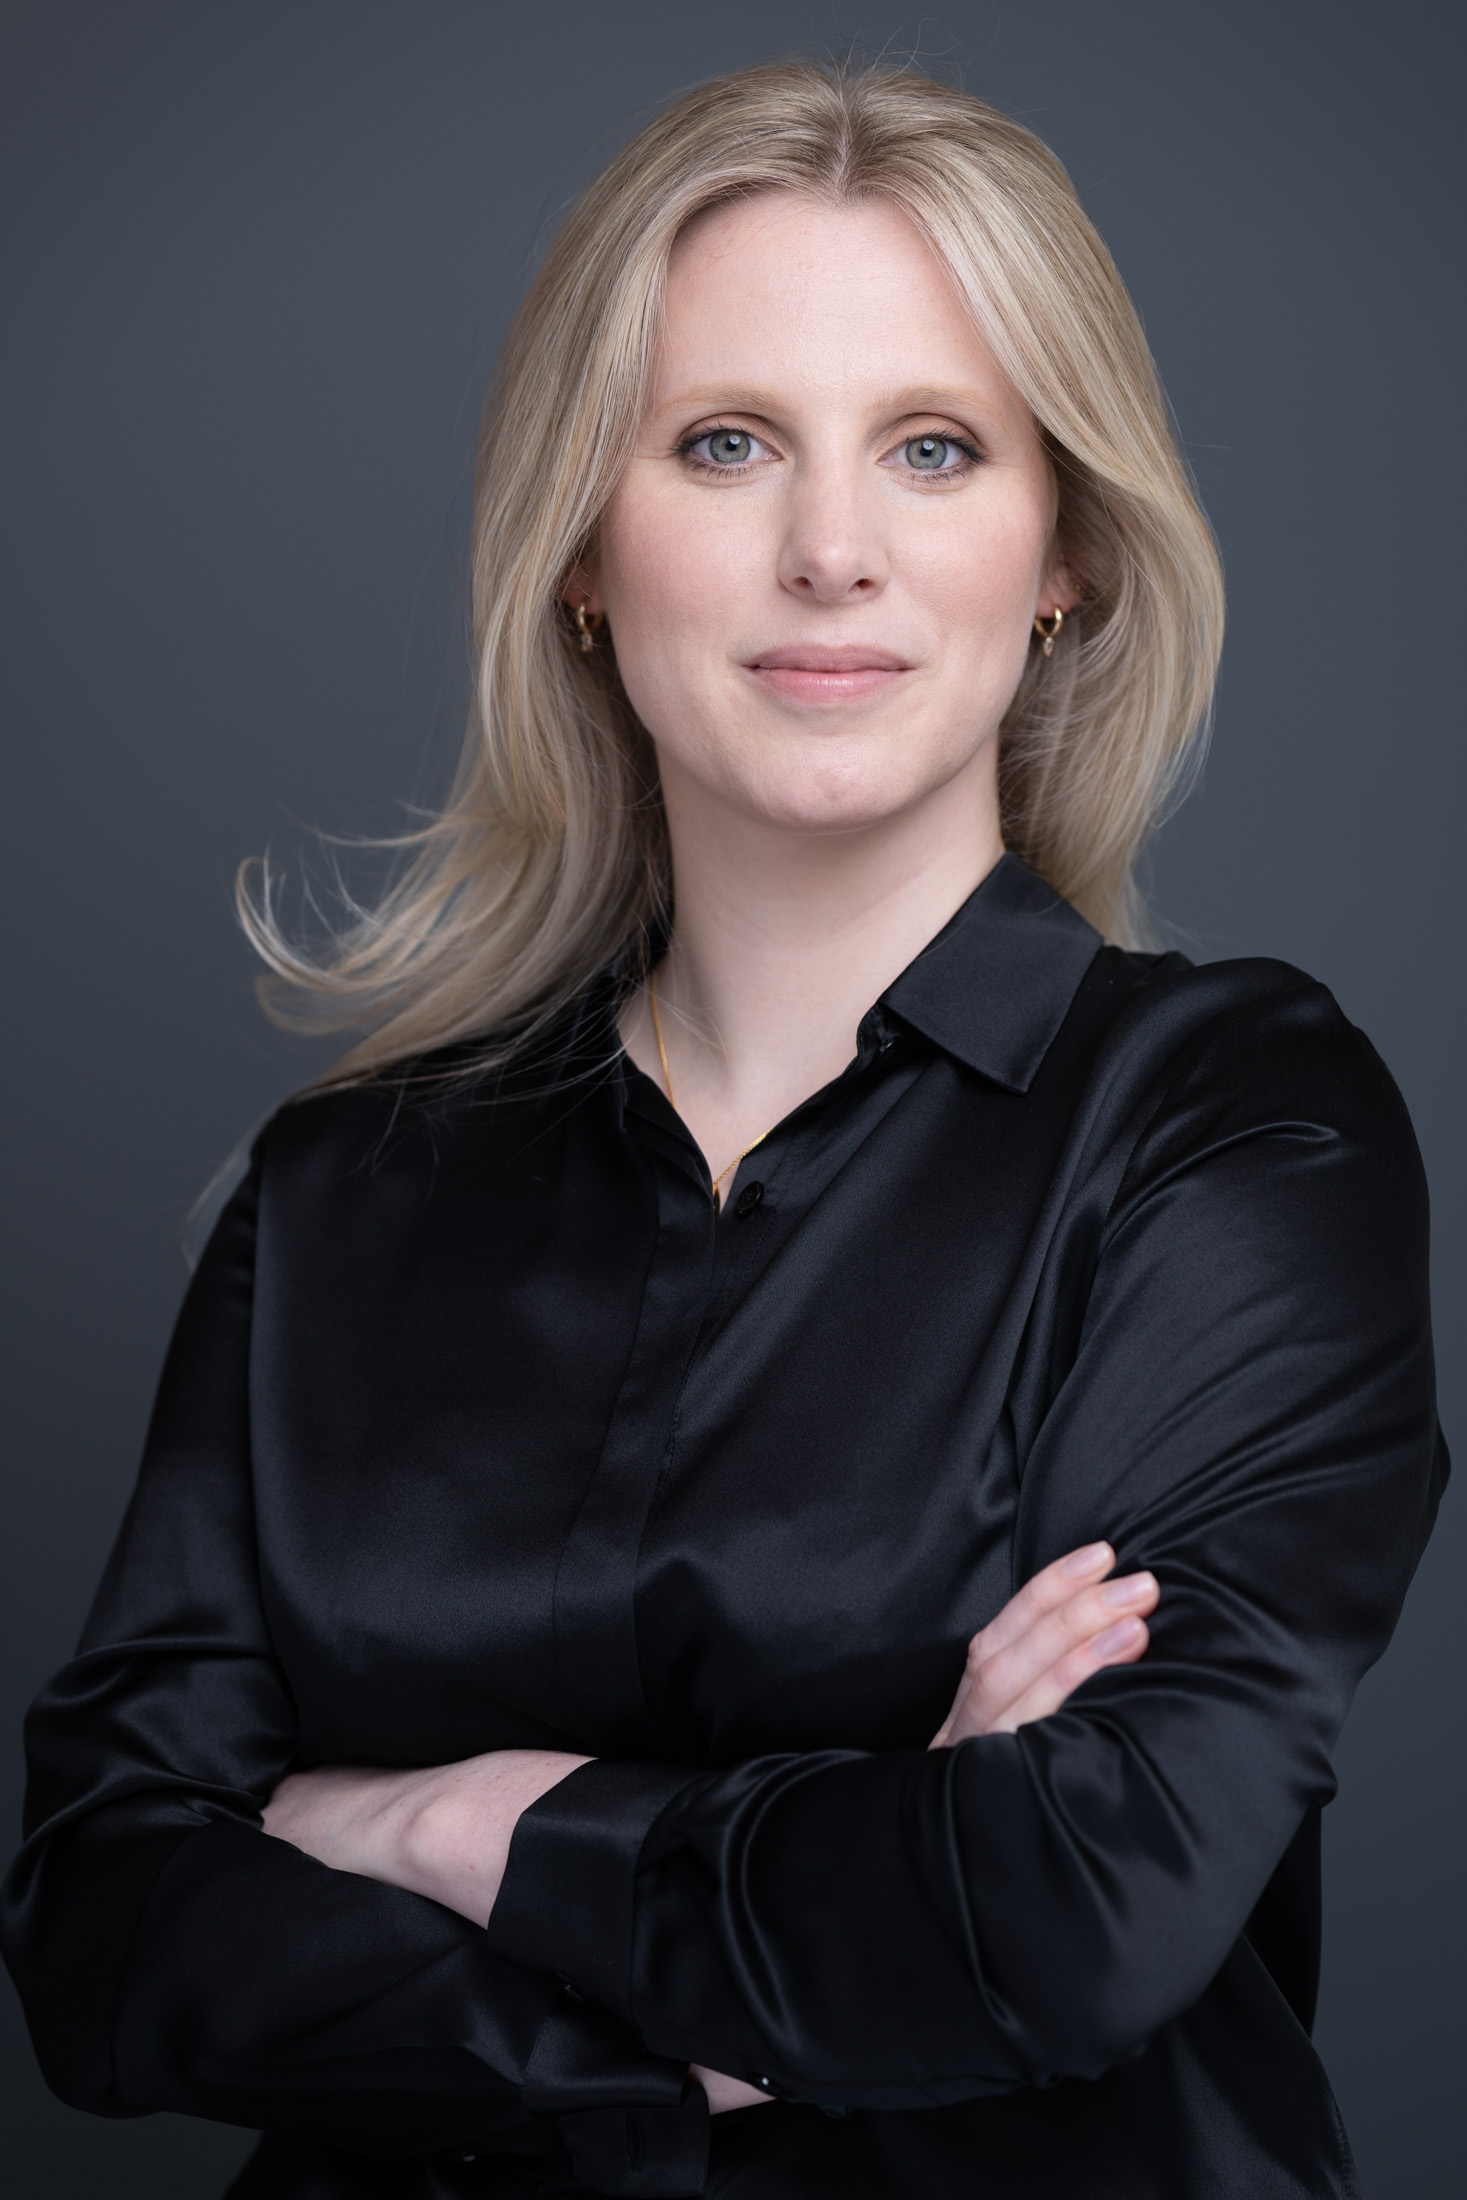
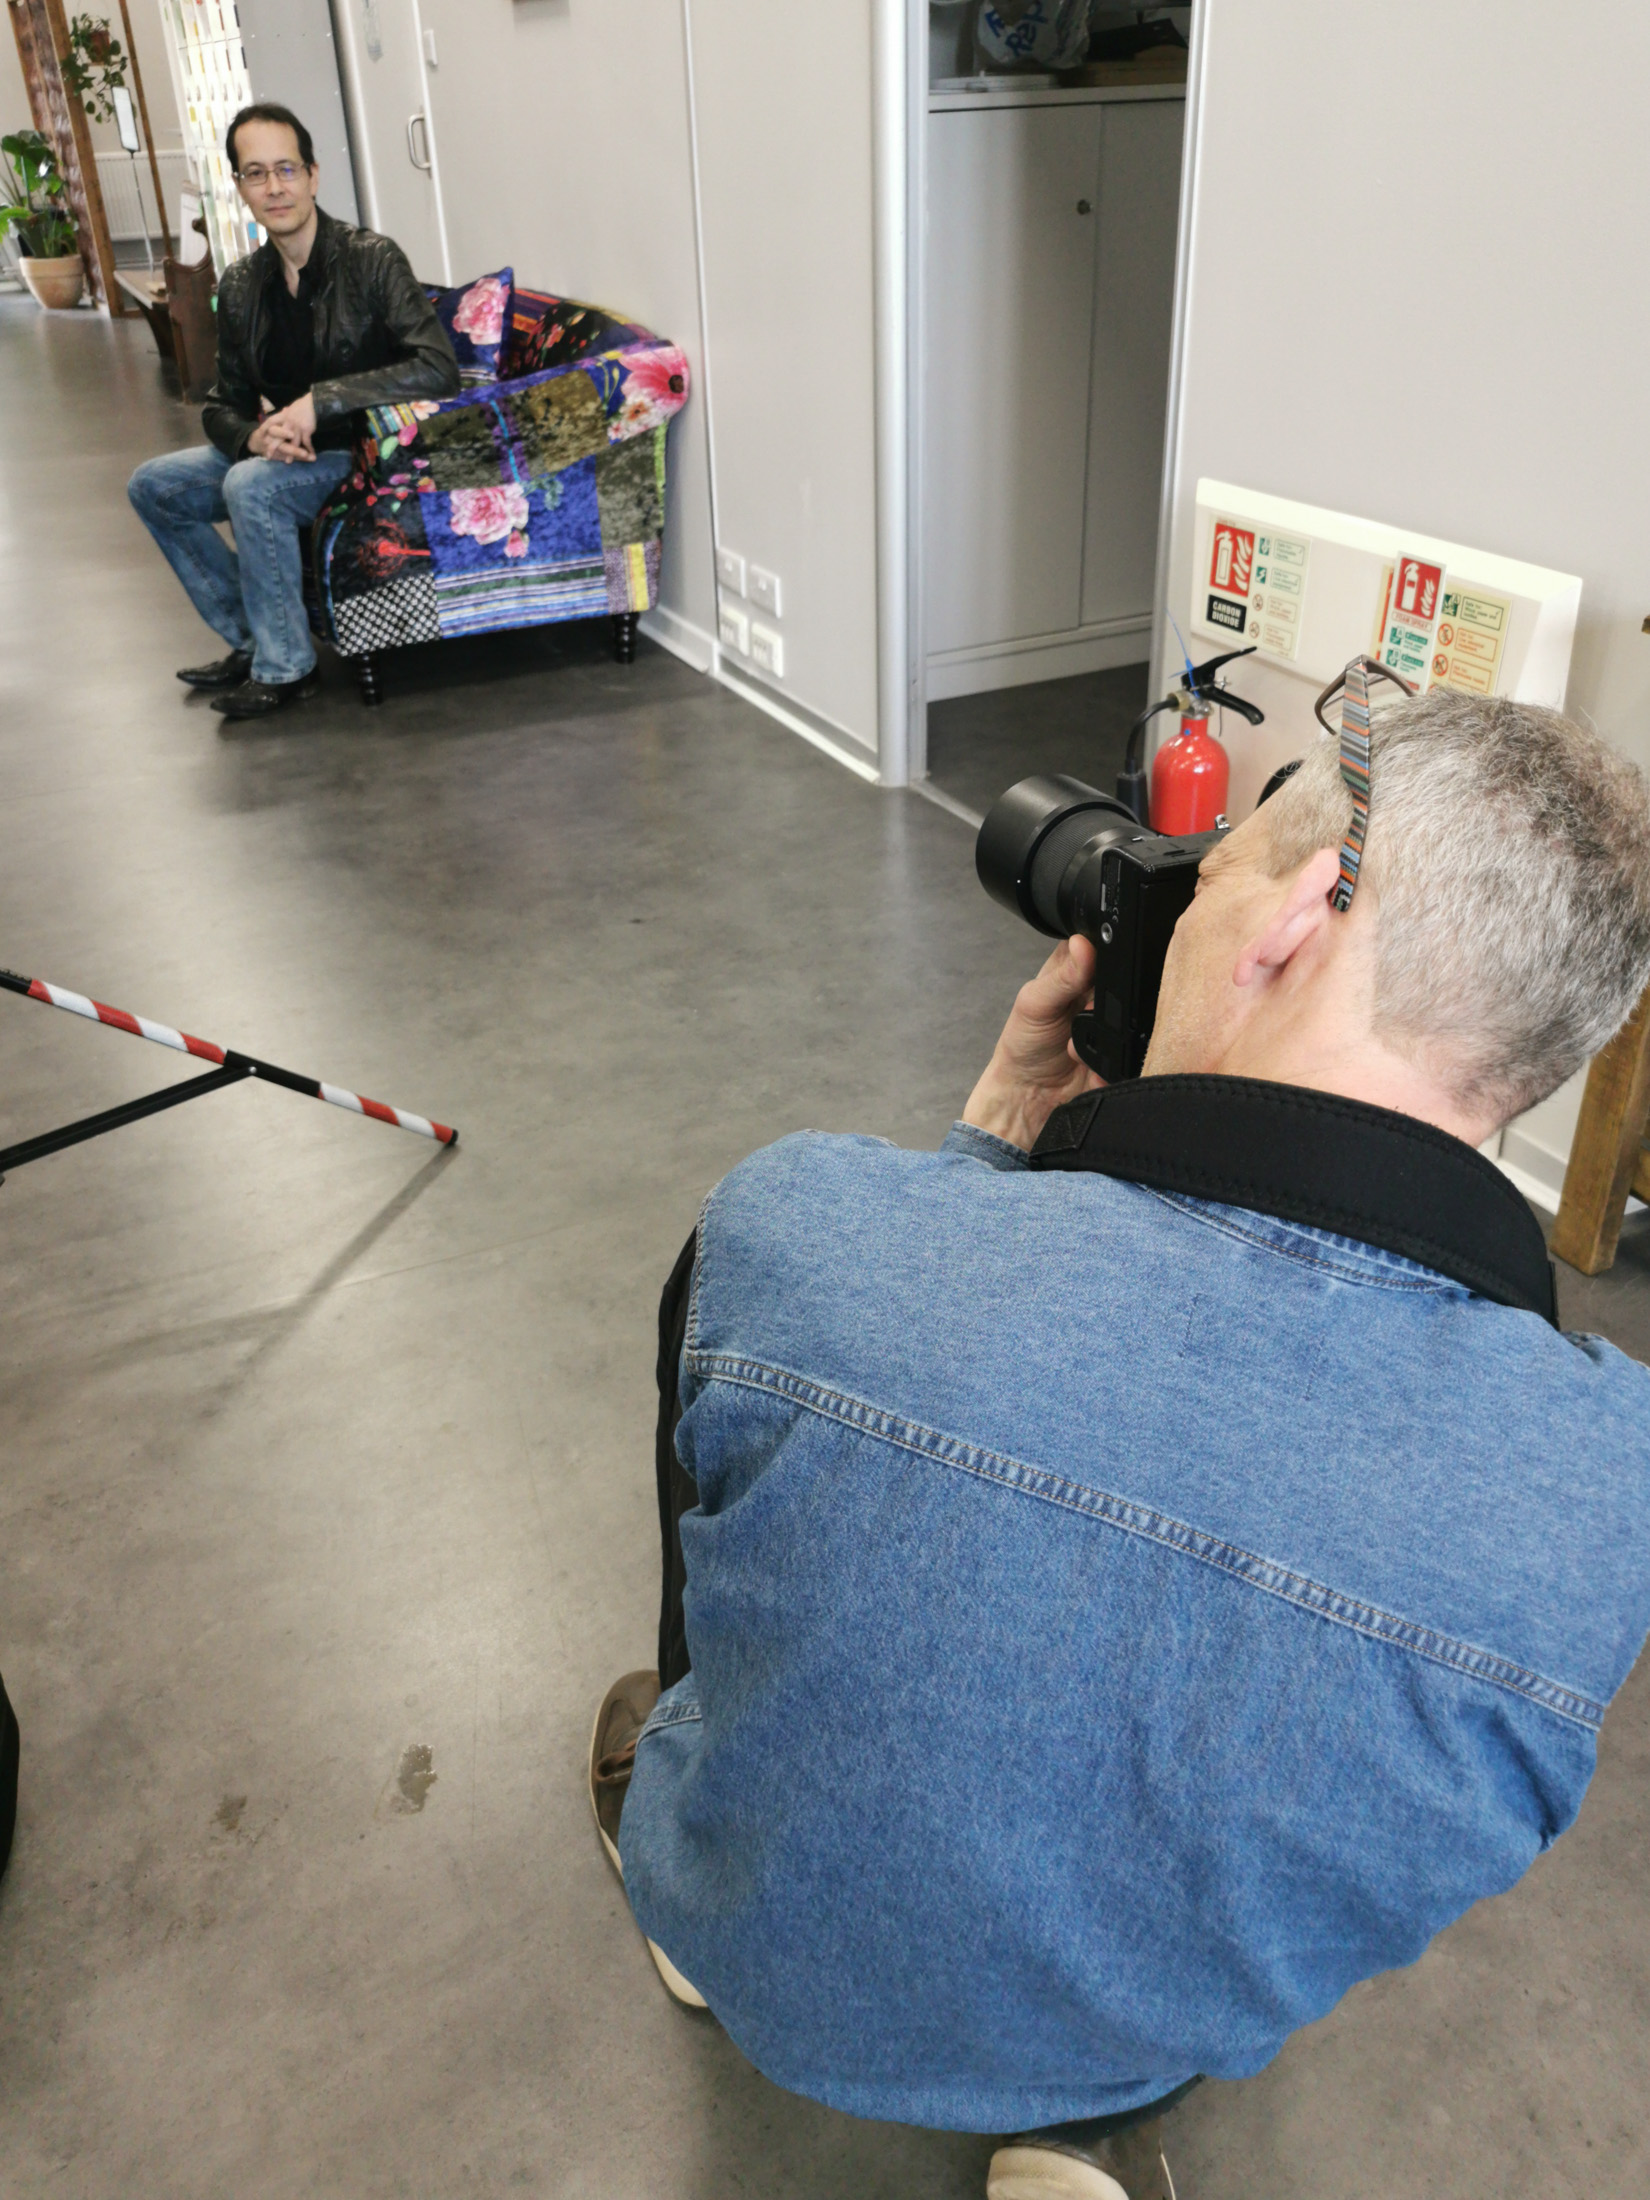
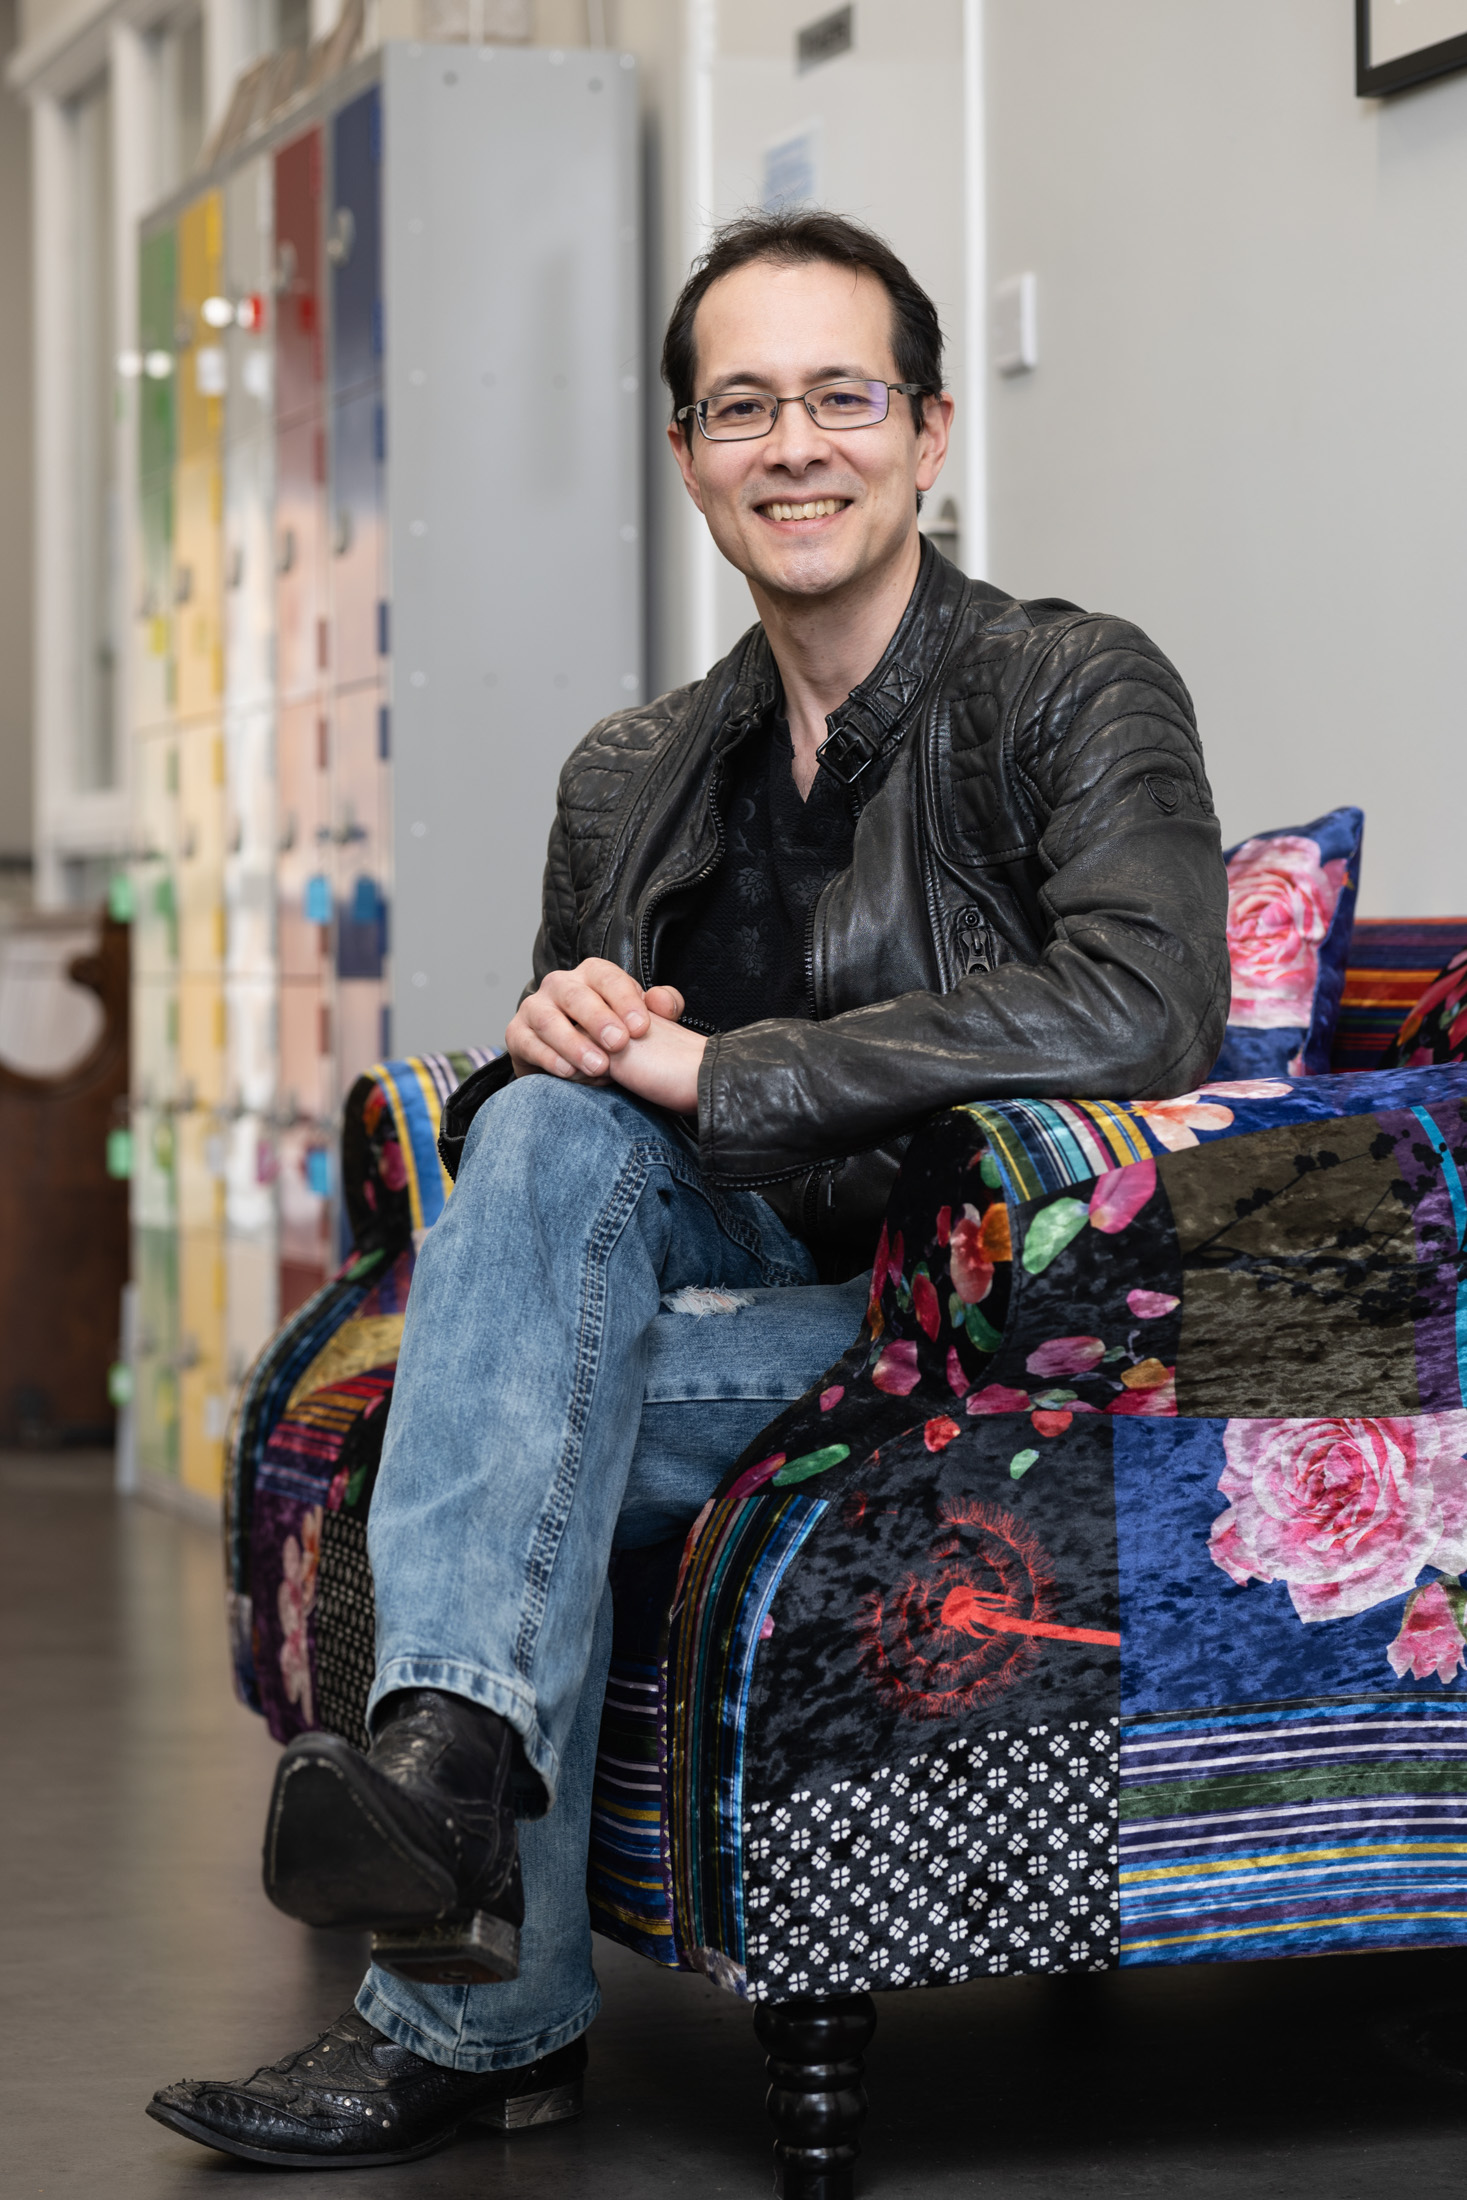
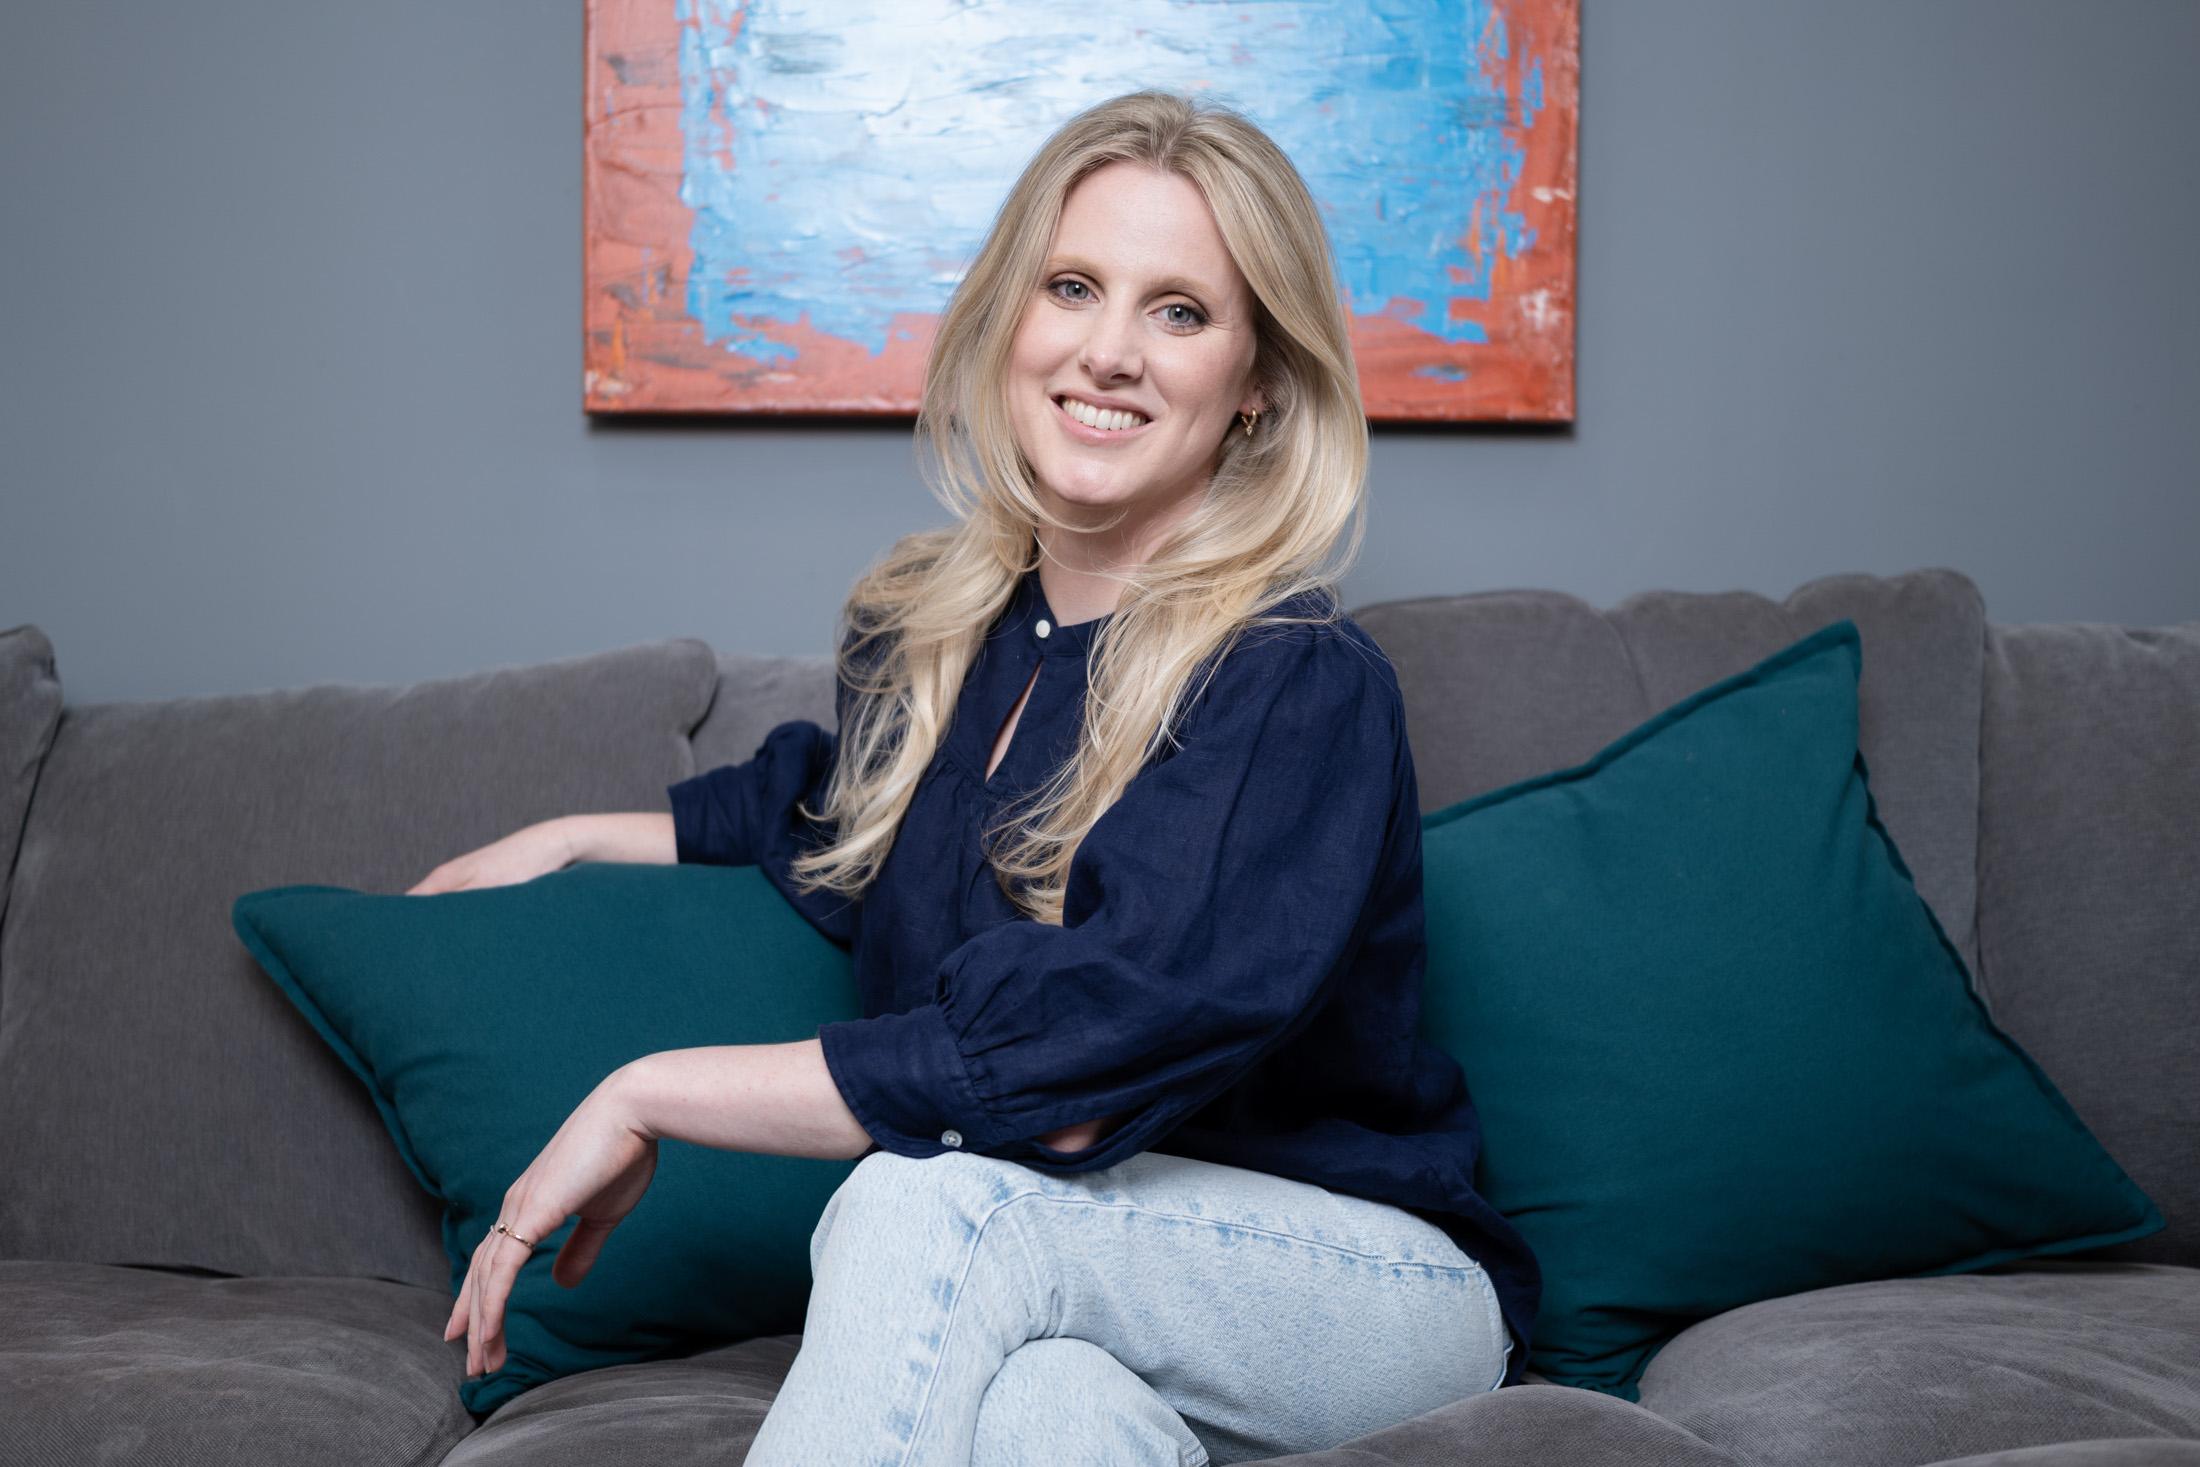
With thanks to Paul Albone and Stefanie Blundell of Pohco Consulting and their new venture Pasamelo for posing so brilliantly, and for their BTS shots of me, and to Futureleap Clifton for hosting us so brilliantly. I also recently used Origin in Berkeley Square, Bristol, who have some fantastic spaces and an incredibly friendly and helpful team.


You Can Photoshop That (truth in pictures)

When does photo manipulation matter?

I’m not going to dwell on recent events regarding the Royal Family and photo manipulation, but I’ve been meaning to write this post for a while. This post is not a judgement or criticism of the Princess of Wales, I’m merely using this as a springboard to a wider topic.

Very often I’ll be taking pictures for a client and the phrase “you can fix that in Photoshop” will rear its ugly head. Sure, many things can be fixed in Photoshop (other image editing software is available), but let’s run through the basic considerations before leaping on the cut-n-paste tool.

Editing time

Moving things around in Photoshop during the editing process usually takes a lot longer than physically moving (or removing) them at the time of creating the photo. Any decent photographer will strive to get everything right in-camera, ie at the moment the photo is taken.

On the whole, I build my editing time into my fees so clients know from the get-go what they’ll be paying for a project. If I then need to extend the editing time to correct for something I wasn’t given time to fix on-site and in-camera, I then have to go back to the client with a revised bill. That’s not always popular.

Deadline

Following on from the previous point, if editing takes longer than planned, this can impact my ability to meet a deadline, so why not save the grief by making sure everything is as it should be at the time the photo is taken?

My Sanity

One thing I try to do when shooting corporate portraits, is ensure the sitter’s hair is tidy, that there aren’t strands across their face and that their clothes aren’t covered in bit of fluff, flakes of skin etc. If it’s a post-lunch shoot, I’ll check there’s no food in their teeth before I start.

Sitting at a computer for hours, endlessly retouching stray hairs, spotting out bits of fluff or removing food bits from between teeth (YUCK!) makes me die a little inside. Far better to spot these things in advance and deal with them in real life.

Ethics

Ok, so this ‘could’ get complicated, but I’ll try to keep it clear and simple.

A retouched or manipulated photo can be used in a business website, leaflet, brochure or corporate social media post (provided the post isn’t put out as a news piece).

Manipulated photos are often used in advertising, which explains why McDonalds’ burgers look edible in the roadside billboards, but taste like damp cardboard whenever you come to eating a real one.

A retouched or manipulated photo CANNOT be used in a press release or as a news image, regardless of destination (web, print, social media, projection onto the Moon). The only retouching allowed would be, for example, the removal of dust spots caused by muck on the image sensor. Minor colour, lightness and sharpening adjustments are fine, but the image has to be an accurate reflection of the captured scene.

Does this make advertorial* a grey area? I don’t think so. Provided the article is labelled as advertorial, image manipulation is acceptable because anyone seeing the article will know it’s not a news piece.

There is a real danger in the area of corporate communication via social media, as Amnesty International discovered when they used a series of AI-generated images to highlight their reports into police violence and sexual harassment in Columbia in 2021. In Amnesty International’s case, they did label their images as AI-generated, but their ethical stance was damaged by the use of fake imagery and they subsequently pulled the posts.

Now AI is a whole new kettle of weird fish, but the principle is the same; images put out by organisations as news or current affairs need to be true. The humble, local press release photo is not exempt just because its’ not going to be picked up by the BBC or Reuters.

And it’s easy to think that a small change doesn’t matter; inserting/removing/tweaking the colour of a company logo, moving or removing an element, addressing some sticking-up hair, putting a hard hat on someone who wasn’t wearing one on a building site – all these are no-nos when the images are destined for any kind of news use, which includes press release material. It doesn’t matter if it’s the local mayor presenting a giant cheque to the local hospice, or a national news event; if it’s offered as a news item it has to meet the criteria of a news image.

For more detailed guidelines on what can/cannot be adjusted in a news image, the Getty guidelines are a very good start.

Staged pictures

This set of pictures from 2023 is a great example of when PR coverage involves a mix of ‘live’ and staged images. The captions for each image explain more of this concept:

In the example above, we have three typical types of PR photo from a single event: the fly-on-the-wall shot, the staged-to-look-not-staged shot and the obviously-staged shot. The middle one is perhaps the least honest, but it’s fair to say that nothing has been added or taken away from the scene as it was captured. In the final photo, I seem to recall going round picking up litter to tidy things up, but again it’s an honest photo of the existing scene. The viewer isn’t fooled that the artist was directed to pose, and this is a common kind of PR photo, but nothing was manipulated in editing software.

What about…?

It’s debatable whether some historical news images would be allowed today. The Independent newspaper’s in-house style of very heavy vignetting in the 1980s and 90s would potentially fall foul of today’s code of ethics. At the very least, a caption note would have to be added to say that the sky had been ‘burned in’.

Other historical pictures were stitched together to recreate a scene from multiple images, but each individual image was not a manipulation; they’ve merely been sequenced into a panorama or extra-wide view of something which existed in front of the camera. Such a photo would require a special note to editors today, but could still likely pass the truth test.

The bottom line

Most importantly, we live in an age where it’s too easy to manipulate images. This degrades the public’s trust in what they see, so it’s more important than ever to ensure that what goes into our news media is true and honest. An insignificant tweak here, a slightly heavy-handed adjustment there and before you know it, a photo is no longer an honest record of a scene or event.

In the course of liaising with a client on their brief, I endeavour to make sure I know the end-purpose of the work. If I’m satisfied they’re purely for corporate communications, I’ll allow for more adjustments than if they’re for editorial. I can adjust images to enhance certain aspects of an image. I might extend a plain backdrop, I’ll tidy up stray hairs and flecks on clothing and more besides.

However, I still prefer to get all these aspects tidied up in real life. It saves my time and my sanity!

*Advertorial is when a client pays to have an editorial-style piece placed in a newspaper or magazine. It’s basically an advert, but usually has the look of an editorial article. Advertorials must always be labelled as such.

Case Study

When an old photo of my lighting kit popped up in my Facebook memories, the first thing I spotted was the bottle of wine. Of course it was. Not only did it remind me of the generosity of a particular client at the time, but it also sparked an idea to write an article about how kit has changed over time. So I took a photo of my kit today to compare and contrast.

Picture 1 was taken in 2015 and shows (apart from the wine) my portable studio flash lighting equipment of that era (in fact, this kit was already several years old by then).

Sadly the photo was already cropped square, so I can’t tell you what was in the rest of the bag; I’m guessing you’d see the second flash head, a spare battery and some other bits and pieces. I clearly took the photo for the purpose of showing off the bottle of wine I’d been given.

So, apart from the wine (shut up about the wine now, Tim), what else is different? Let’s go through some of the components in the bag, and then compare them with today’s kit in Picture 2. I’ve made these pictures BIG so you can see the labels.

At the top-left in Picture 1, you’ll see a trigger and receiver. Nothing remarkable there, except today’s receivers are built into the flash heads themselves. This saves having to Velcro a trigger to the back of the head and rely on a cable to send the firing signal to the flash. It’s a little bit tidier now.

The other disadvantage of the old system was that you could only adjust the power of the flash head by walking up to the controller pack and turning a dial. Modern units can be controlled from the camera, which saves a lot of time and back-and-forth.

This old kit was pretty revolutionary in its day. It was the first properly powerful, affordable kit that ran off batteries. It could be used outdoors and the light could be adjusted through softboxes, umbrellas or any number of other modifiers to achieve a particular look.

But technology moves on, and its main disadvantages over my current kit are power and control. The kit in Picture 2 is at least 50% more powerful than the kit it replaced. This might not seem that much, but it makes a big difference in photographic terms. The more modern design also has the advantage that each flash head is independently controllable from the other, and the increments of control are far finer than with the old kit.

The other disadvantage of the older kit was the build quality. The manufacturer, Lumedyne, is US-based and their kit looks and feels as though it’s been built by keen mechanics in a shed. Sometimes not all that well either. I remember screws dropping out, a control knob falling off and on one occasion, a loud POP! and a puff of blue smoke as an internal component blew up.

I probably had that kit for a decade though, and while it was expensive at the time, it more than paid for itself.

Thankfully, I’ve had the newer kit (made by Godox) for almost as long already, and it’s not showing any signs of ageing. I’ve added an extra spare battery as one of the originals isn’t taking a charge as well as it used to, but that’s about it.

Apart from technological advances, the other reason I switched to Godox was because Lumedyne is no longer distributed in the UK, so replacing parts or expanding the kit would be difficult.

Possibly more impressive than any of the technical advances of the contents is the case itself. Both flash kits have been safely transported inside the same LowePro Pro Roller 2 case, which must now be circa 20 years old. About a year ago, I finally replaced the wheels but apart from that this case just keeps… rolling.

The wine, sadly, is a distant memory, but good quality wine is readily available in several outlets. So next time I work with you, have a peek inside my rolling camera case while my back is turned. If there’s a wine bottle-shaped space in there, feel free to pop something nice in, like a Tempranillo or a Malbec. Some technology never really needs updating, just replenishing.