Tethered Capture (seeing the bigger picture)

There’s been a bit of a kerfuffle in the press lately about Royalty and tethering (I won’t expand on that here) and it reminded me that I’ve never really explained what tethering means from a photographer’s point of view and why it might be useful to a client.

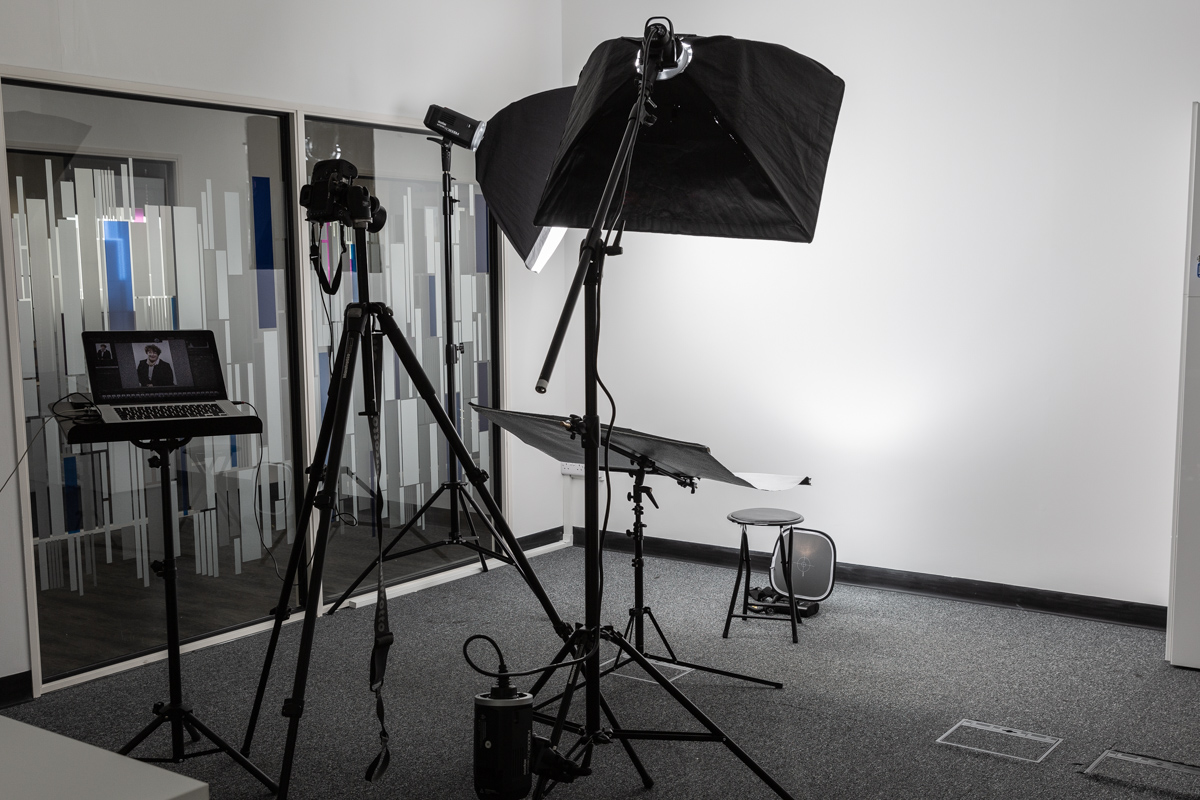
Tethering is a method of taking photos while the camera is linked to a laptop via a cable, but what it involves and why you’d want to do it is worth a little further explanation.

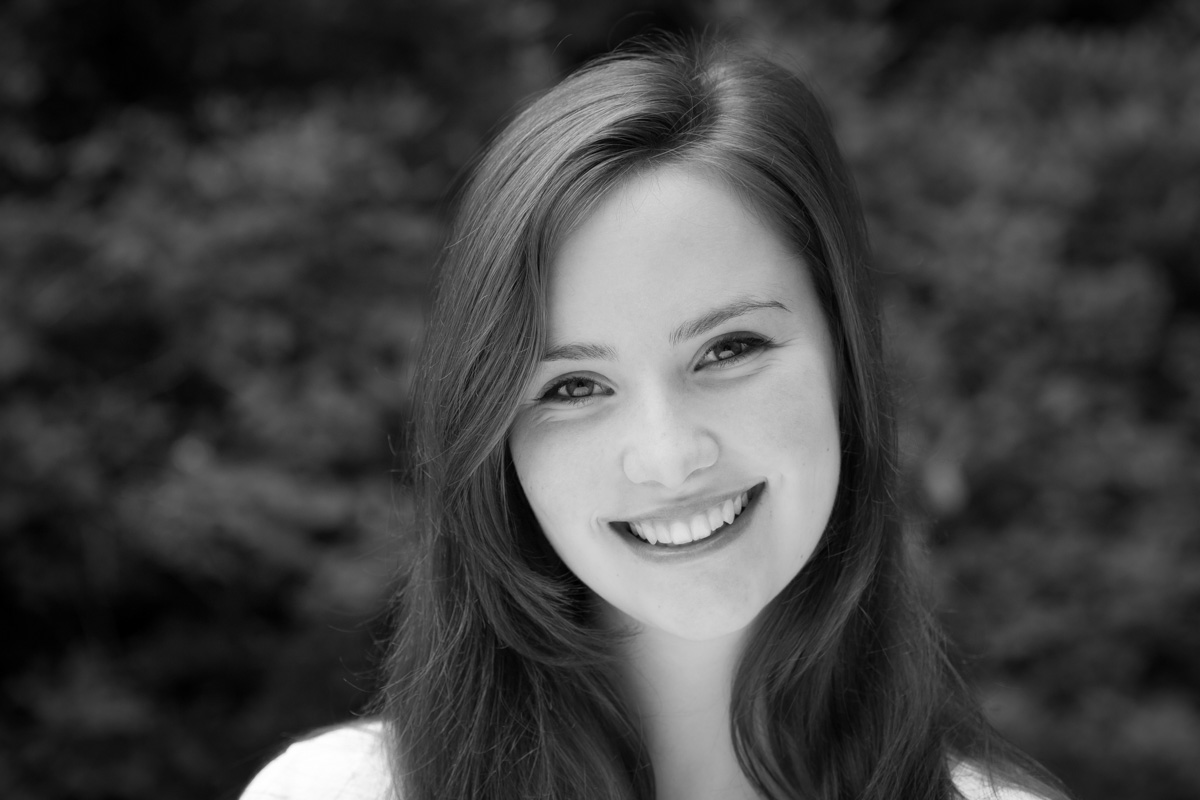
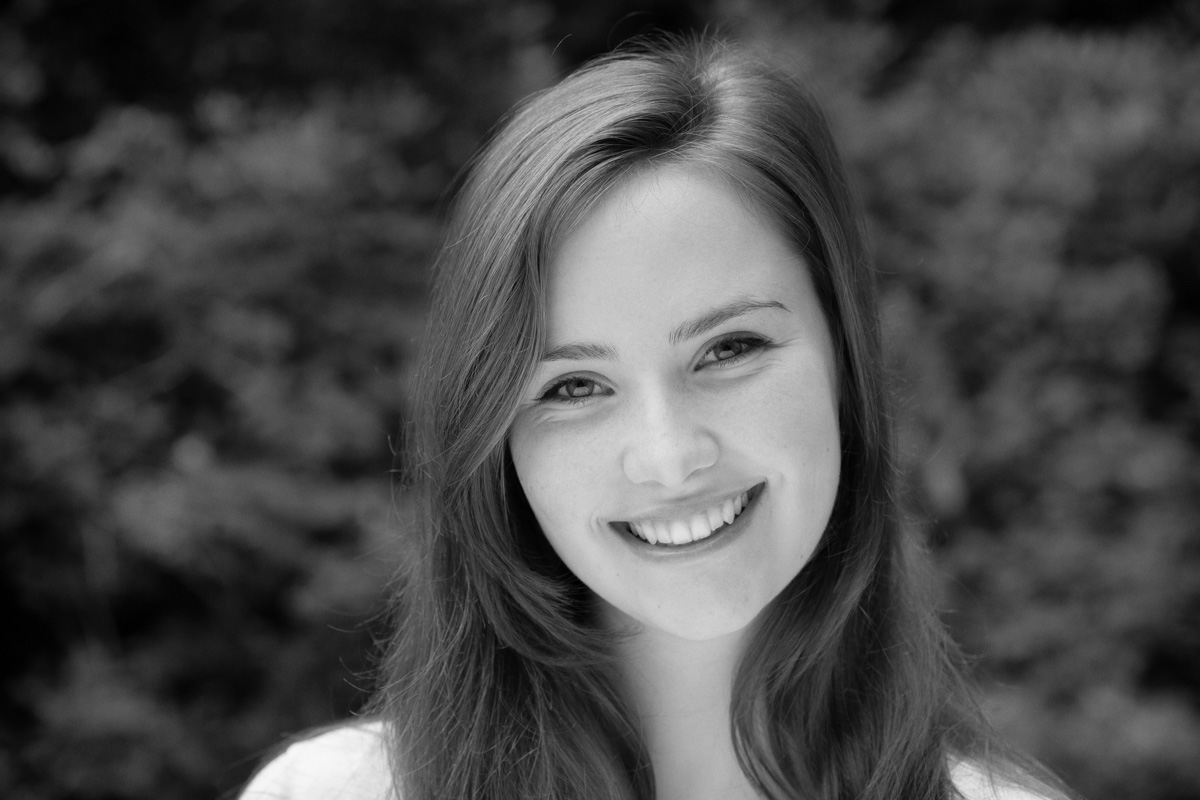
Tethered capture, as it’s often called, allows the photographer to review photos on a laptop within about a second of them being taken. Of course pictures can be reviewed on the back of the camera, and that’s my regular way of working. However that tiny little screen, often obscured with nose grease (yum!) isn’t always the best way to check fine detail.

A far better solution is to take test shots, then review them on the laptop screen to see how the light is working and whether any tweaks to clothing or hair might be necessary. Really fine details (a cat hair on a lapel, or a stray hair across an eye) are often only visible when viewed on a larger screen.

The software which allows the pictures to display on the laptop (I use Adobe Lightroom) can also be set to show a rough idea of the final treatment (colour, contrast, sharpening etc) that I’ll be using, so a marketing executive can get an idea of how the finished images will look and we can adjust according to their requirements.

Likewise the sitters also benefit from being able to view the images on a decent-sized screen so they can be happy with their shots before going back to their work. They’ll have a much clearer idea of what we’re getting and this can also help them relax into the shoot. Once we’re happy with the test shots, I don’t tend to look at the screen again until after each person’s sitting.

The other reason I like to work this way if I can is that it means the images are backed up automatically as I shoot – one set on the camera card, a duplicate set on the laptop hard drive. So if there is a failure, I’ve a better chance of recovering images which might otherwise be lost.

Of course tethering only works for the headshot work I do because camera movement is limited by the cable length and the reliability of the connection. I couldn’t shoot a corporate event or a conference using tethering, it just wouldn’t be practical, but for the business headshot it’s a useful tool.

It’s also possible to get camera and computer to communicate via wifi, but this can be too fiddly and unreliable, so I tend to use the cable method.

So if I turn up at your corporate headshot session with a music stand, don’t panic: I’m not about to pull a cello from my rolling case and launch into a Rachmaninoff sonata, sometimes it’s just handy to work tethered and to see the bigger picture.


Working Effextively

If you look at my corporate communications photography you won’t see much in the way of special effects or filters. I would describe my style as clean, bright, modern and (influenced by my news background) mostly un-touched by stylistic manipulations.

That isn’t to say I don’t appreciate the work of photographers whose images might be more stylised in their finish, but it has to be done with purpose, consistency and definitely mustn’t be overdone. So it’ll be interesting to see if the release by Google of their Nik Collection imaging software as a free download (up to now it’s been a relatively expensive suite of editing tools) will have a noticeable effect on many professional photographers’ portfolios.

Will there be a rush to explore and play with the multitude of effects (believe me, there are many, possibly hundreds), each tweakable to one’s heart’s content?

I decided to download the software myself and have a play. After all, I am sometimes asked to do black and white conversions; this requires more than just removing colour from an image. I’ve always been happy with how I do this in Lightroom, but could the Nik Silver Efex Pro plugin for Lightroom enable me to do this better or quicker?

The other plugin I wanted to try was the Analog Efex Pro 4 part of the suit as I wanted to see if there were colour treatments which might suit some of my clients looking for a particular look for the web or brochure images.

The gallery on this page shows some of the results of my “playing about.” I’ve included one version which shows what can happen if you just apply one of the automated effects without due care and attention. I’ll leave you to guess which one it is.

Roll your mouse over the preview images to see what software was used and click on an image to see it larger.

I have to say that in my limited time using the software I’ve found the vast majority of it to be surplus to requirement, but then there are always great swathes of any imaging software which most photographers never use, it’s just a matter of finding the useful bits and sticking to using those.

Perhaps a bigger issue for me, and I’m willing to accept this might be a novice mistake, is that I can’t see how to apply edits across a range of images in one go, known as synchronising in Lightroom. I’m assuming there is a way of doing this (maybe saving edits as a preset?), but if not then it could mean using any of these editing tools is going to be long-winded for anything other than occasional, individual files.

On a lesser note, the difference between a Lightroom mono conversion and a Silver Efex one seems to be a matter of preference and probably some more tweaking in the software. If there isn’t an easy way to synchronise adjustments across images within the Nik software, it’ll be of little benefit.

I suspect I will turn to the Nick software on occasion, but maybe more for personal projects or experimentation on individual files. I think it’s safe to say I’m not going to start applying filters regularly to my images by default, probably only when a client requests it.


Clarity within reason

I recently blogged about photographers who profess to use only natural light (ie they hadn’t figured out flash, so why not hide ignorance and pretend flash is for some sub-species of photographer), but another trend that’s been getting under my skin recently is the over-use of something called Clarity.

In case you’re wondering, clarity is an adjustment photographers can make to their photos from within Adobe’s Lightroom application. What it does in (really brief) layman’s terms is increase contrast in the mid-tone areas of a photograph. It doesn’t do much to the brightest and darkest areas of a photo, but it can improve or make a real mess of the in-between tones.

I use Clarity on many of my images just to add a little more ‘punch’ than is in the original RAW camera image, but the rule I apply to the Clarity slider is the same one I apply to many image-processing effects, that is; if I can see the effect, I’ve probably gone too far.

And too far is what I’ve seen a lot of recently. Especially on portraits. I first noticed the sledgehammer application of Clarity in a Sunday Times Culture magazine portrait of Jack Nicholson last year. I wish I could show it here so you’d see what I mean, but I can’t find it now, so instead I’ve demonstrated the over-Clarity effect below with one of my own photos.

You’ll see this effect used on some corporate portraits too, and to be honest I think it looks ghastly. It ages all whose portraits are touched by it. It gives everything a kind of super-digital weirdness and makes skin look bruised and like badly dried-out leather.

I thought it worth writing this article because if you’re looking to commission portraiture for your company and would like to avoid the DFS-face-effect provided by the Clarity-hammer, you might want to recognise the signs of its use in the portfolios of the photographers you’re considering using. Then decide if that’s the look for you.

Portrait of farmer

Just a touch of clarity here. Can you see it?

Farmer portrait

Not so subtle. His hat looks 'bruised' around the edges and the face details are looking over-cooked

Farmer portrait

AAAAAAAAAGH! MY EYES! THEY'RE BURNING!