When an old photo of my lighting kit popped up in my Facebook memories, the first thing I spotted was the bottle of wine. Of course it was. Not only did it remind me of the generosity of a particular client at the time, but it also sparked an idea to write an article about how kit has changed over time. So I took a photo of my kit today to compare and contrast.
Picture 1 was taken in 2015 and shows (apart from the wine) my portable studio flash lighting equipment of that era (in fact, this kit was already several years old by then).
Sadly the photo was already cropped square, so I can’t tell you what was in the rest of the bag; I’m guessing you’d see the second flash head, a spare battery and some other bits and pieces. I clearly took the photo for the purpose of showing off the bottle of wine I’d been given.
So, apart from the wine (shut up about the wine now, Tim), what else is different? Let’s go through some of the components in the bag, and then compare them with today’s kit in Picture 2. I’ve made these pictures BIG so you can see the labels.
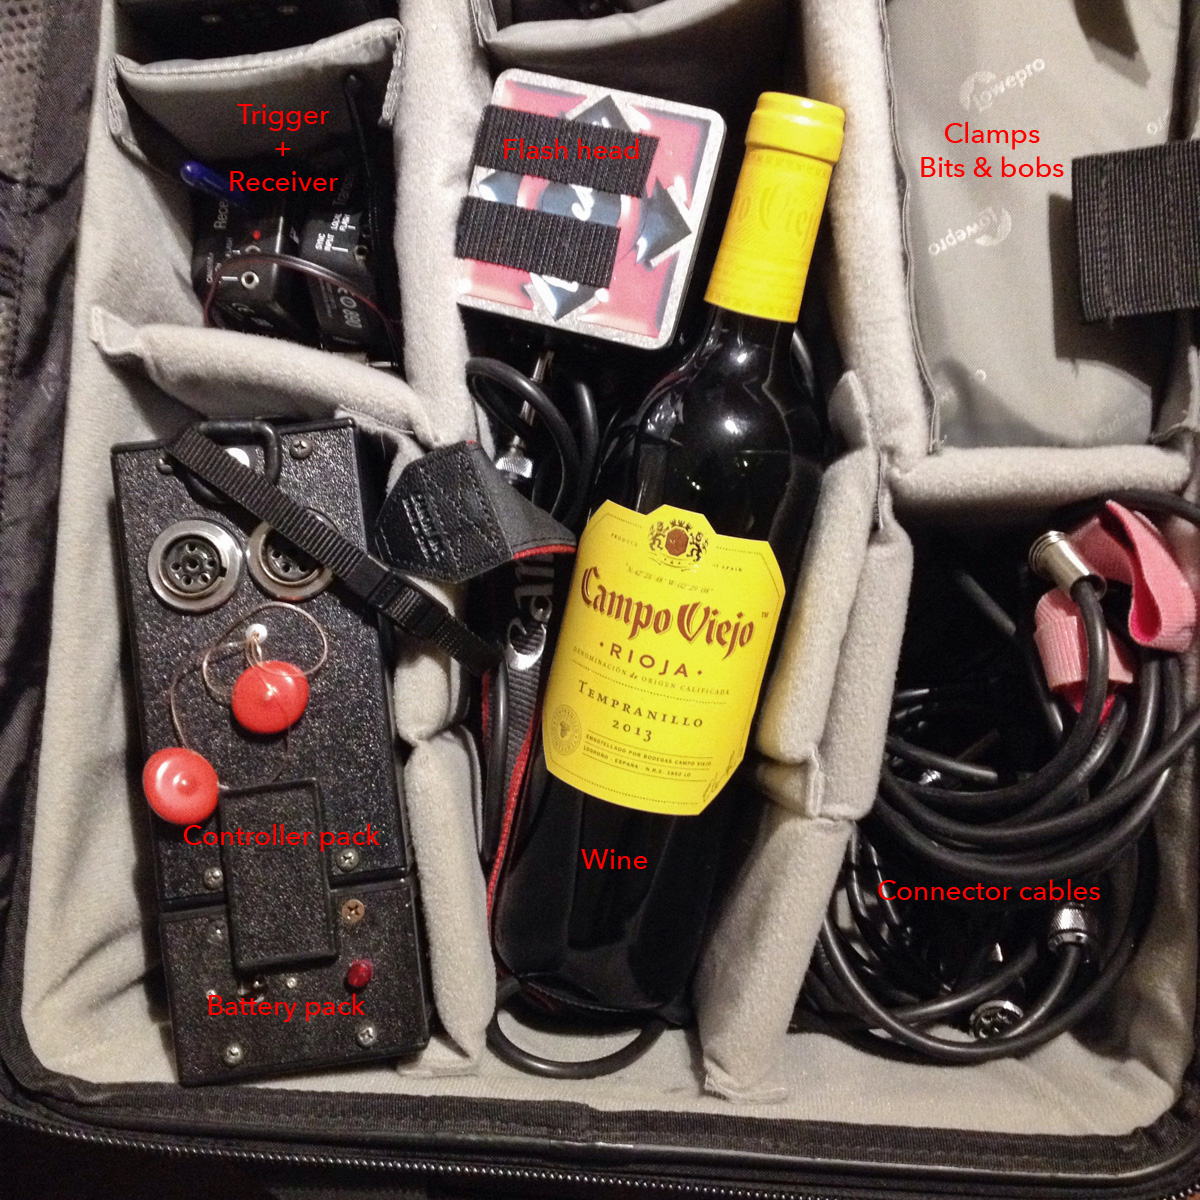
At the top-left in Picture 1, you’ll see a trigger and receiver. Nothing remarkable there, except today’s receivers are built into the flash heads themselves. This saves having to Velcro a trigger to the back of the head and rely on a cable to send the firing signal to the flash. It’s a little bit tidier now.
The other disadvantage of the old system was that you could only adjust the power of the flash head by walking up to the controller pack and turning a dial. Modern units can be controlled from the camera, which saves a lot of time and back-and-forth.
This old kit was pretty revolutionary in its day. It was the first properly powerful, affordable kit that ran off batteries. It could be used outdoors and the light could be adjusted through softboxes, umbrellas or any number of other modifiers to achieve a particular look.
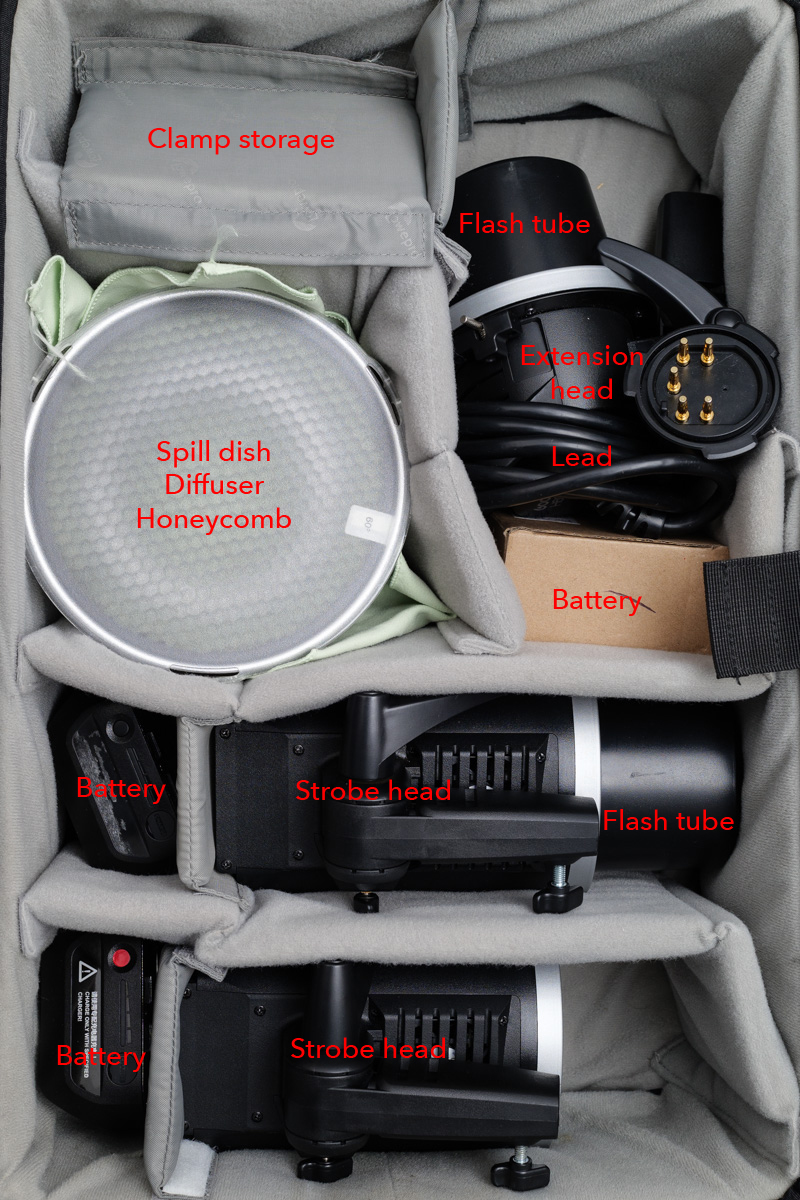
But technology moves on, and its main disadvantages over my current kit are power and control. The kit in Picture 2 is at least 50% more powerful than the kit it replaced. This might not seem that much, but it makes a big difference in photographic terms. The more modern design also has the advantage that each flash head is independently controllable from the other, and the increments of control are far finer than with the old kit.
The other disadvantage of the older kit was the build quality. The manufacturer, Lumedyne, is US-based and their kit looks and feels as though it’s been built by keen mechanics in a shed. Sometimes not all that well either. I remember screws dropping out, a control knob falling off and on one occasion, a loud POP! and a puff of blue smoke as an internal component blew up.
I probably had that kit for a decade though, and while it was expensive at the time, it more than paid for itself.
Thankfully, I’ve had the newer kit (made by Godox) for almost as long already, and it’s not showing any signs of ageing. I’ve added an extra spare battery as one of the originals isn’t taking a charge as well as it used to, but that’s about it.
Apart from technological advances, the other reason I switched to Godox was because Lumedyne is no longer distributed in the UK, so replacing parts or expanding the kit would be difficult.
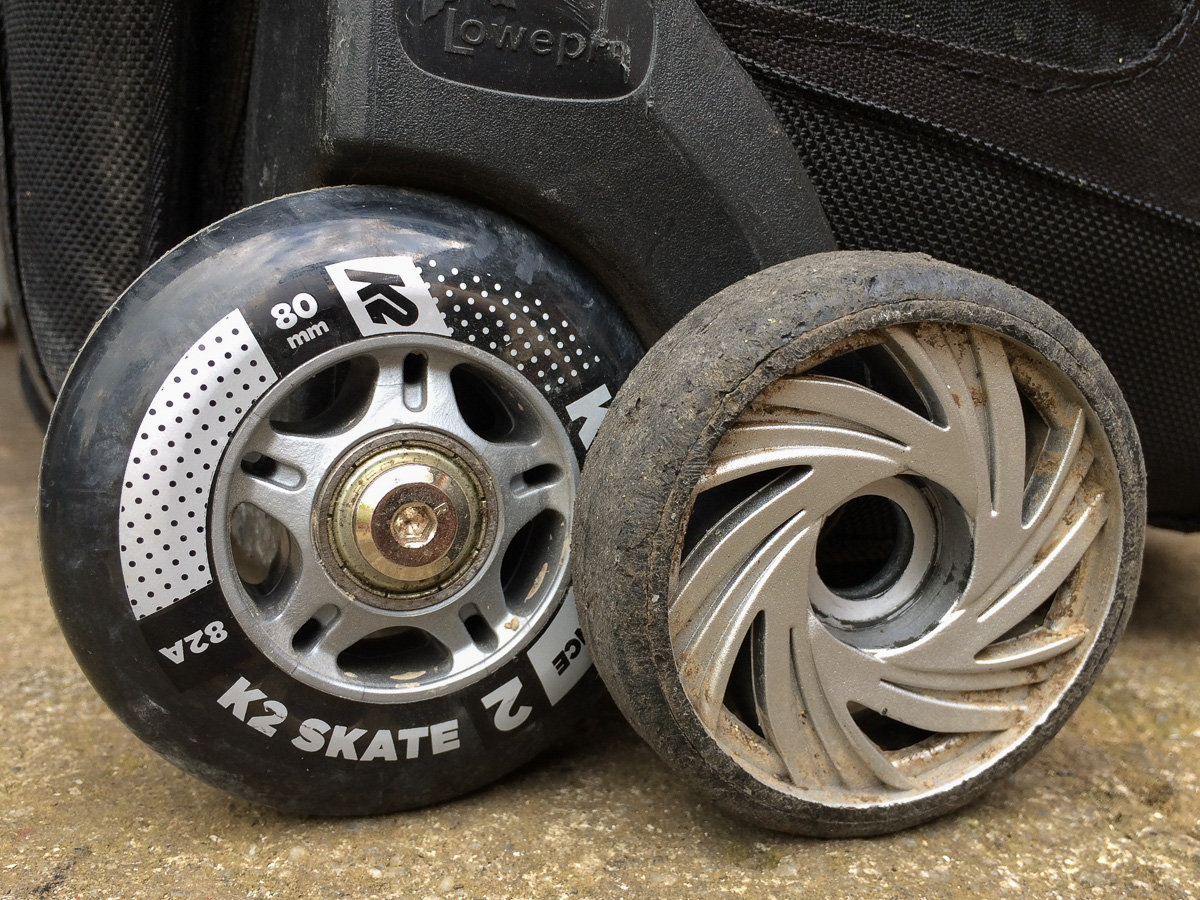
Possibly more impressive than any of the technical advances of the contents is the case itself. Both flash kits have been safely transported inside the same LowePro Pro Roller 2 case, which must now be circa 20 years old. About a year ago, I finally replaced the wheels but apart from that this case just keeps… rolling.
The wine, sadly, is a distant memory, but good quality wine is readily available in several outlets. So next time I work with you, have a peek inside my rolling camera case while my back is turned. If there’s a wine bottle-shaped space in there, feel free to pop something nice in, like a Tempranillo or a Malbec. Some technology never really needs updating, just replenishing.